Using the CLI Tool
Introduction
AutoKitteh is an API first platform and supports management of all elements of your automation project via CLI.
For a full list of commands, run: ak, ak -h, or ak --help.
We will use the quickstart project as an example.
AutoKitteh projects consist of a set of objects. Each object has an object ID and name in this format:
[Three letters that indicate the object type]_[unique ID]
Here is an example of a project ID:
prj_01j0gkaa6kf3evg8j18thk210w
Project Flow
As explained in Introduction Model and Tools, the main steps for a project are:
Setup - either with a manifest file for quick setup, or with individual CLI commands for full control of the setup.
Build & Deploy - see below
Manage & Monitor - see below
Setup
You can either set up a project with individual CLI commands or you can use a manifest .yaml file to declare and apply project setup.
Setup With Manifest
You can set up a project using a manifest file that describes the project.
A manifest file specifies:
- Project Name
- Connections
- Triggers
- Variables
See here for the format and explanation of the AutoKitteh Manifest file.
Here is a simple manifest file for a project called quickstart. It uses an HTTP connection and it is triggered by
HTTP GET request to URL: [server address]:9980/http/quickstart/trigger_path. When triggered, the function on_http_request in file program.py will be the entry point:
# This YAML file is a declarative manifest that describes
# the minimal setup of an AutoKitteh project.

version: v2

project:
  name: quickstart
  connections:
    - name: http_conn
      integration: http
  triggers:
    - name: http_request
      connection: http_conn
      data:
        path: trigger_path
      call: program.py:on_http_request
- All project files and directories should be located in the same directory as the manifest file.
- All files in the directory tree will be loaded by the server, up to a limit of 5 MB. Trying to apply a manifest from a directory tree that contains more than 5 MB of data will fail.
After creating a manifest file use the command below to complete the setup.
ak manifest apply quickstart/autokitteh.yaml
The result of this command is a set of project objects.
[plan] project "quickstart": not found, will create
[plan] connection "quickstart/http_conn": not found, will create
[plan] trigger "quickstart/default:quickstart/http_conn/http_get": not found, will create
[exec] create_project "quickstart": prj_01j1cbep1hfdbb5xmstjs57vps created
[exec] create_connection "quickstart/http_conn": con_01j1cbep20ftd9k532wymztkrb created
[exec] create_trigger "quickstart/default:quickstart/http_conn/http_get": trg_01j1cbep26ema8wdsthscbt73g created
You can modify the manifest file and apply it. AutoKitteh will do the necessary changes to apply the new setup.
After setting up the project you need to build and deploy it. You can use a shortcut to apply the manifest, build and deploy it with a single command:
ak deploy --manifest quickstart/autokitteh.yaml
In case there are connections that require initialization, you will need to follow the instructions in the console.
Setup With Individual CLI Commands
Creating and Managing Projects
To create a new project:
ak project create [--name project-name]
Example:
ak project create --name=quickstart
project_id: prj_01j1ccr7w2ek7ak4fm0bba9sn4
To delete a project:
ak project delete[--name project-name], for example:
ak project delete prj_01j1ccr7w2ek7ak4fm0bba9sn4
To get a list of all projects:
ak project list
project_id:"prj_01j1ccr7w2ek7ak4fm0bba9sn4"  name:"quickstart"
Creating Connections
Each project requires one or more Connections. Connections utilize AutoKitteh Integrations. An Integration represents an application your automation can interact with during execution such as Slack, Github, HTTP etc. To see a list of Integrations supported by AutoKitteh:
ak integration list -J

{
  "integration_id": "int_3kth000awsd8dcbf186baf9a84",
  "unique_name": "aws",
  "display_name": "AWS (All APIs)",
  "logo_url": "/static/images/aws.svg",
  "connection_url": "/aws/connect",
  "connection_capabilities": {
    "supports_connection_init": true
  }
}
...
A Connection is an instance of an Integration associated with a project. Typically Connections require specification of parameters, such as secrets. Note that the usage of Connections differs between SDKs.
To create a connection:
ak connection create <name> <--project=...> <-integration=...> [--quiet]
Example: Create HTTP Connection for Incoming HTTP Webhooks
You can use HTTP webhooks to trigger workflows. To create an HTTP connection for the project:
ak connection create http_get --project=quickstart --integration=http

Connection created, and can be initialized. Please run this to complete: ak connection init con_01j1cdab5nf4hrwqpgqq3geshc
connection_id: con_01j1cdab5nf4hrwqpgqq3geshc
You can optionally initialize HTTP secrets:
ak connection init con_01j1cdab5nf4hrwqpgqq3geshc
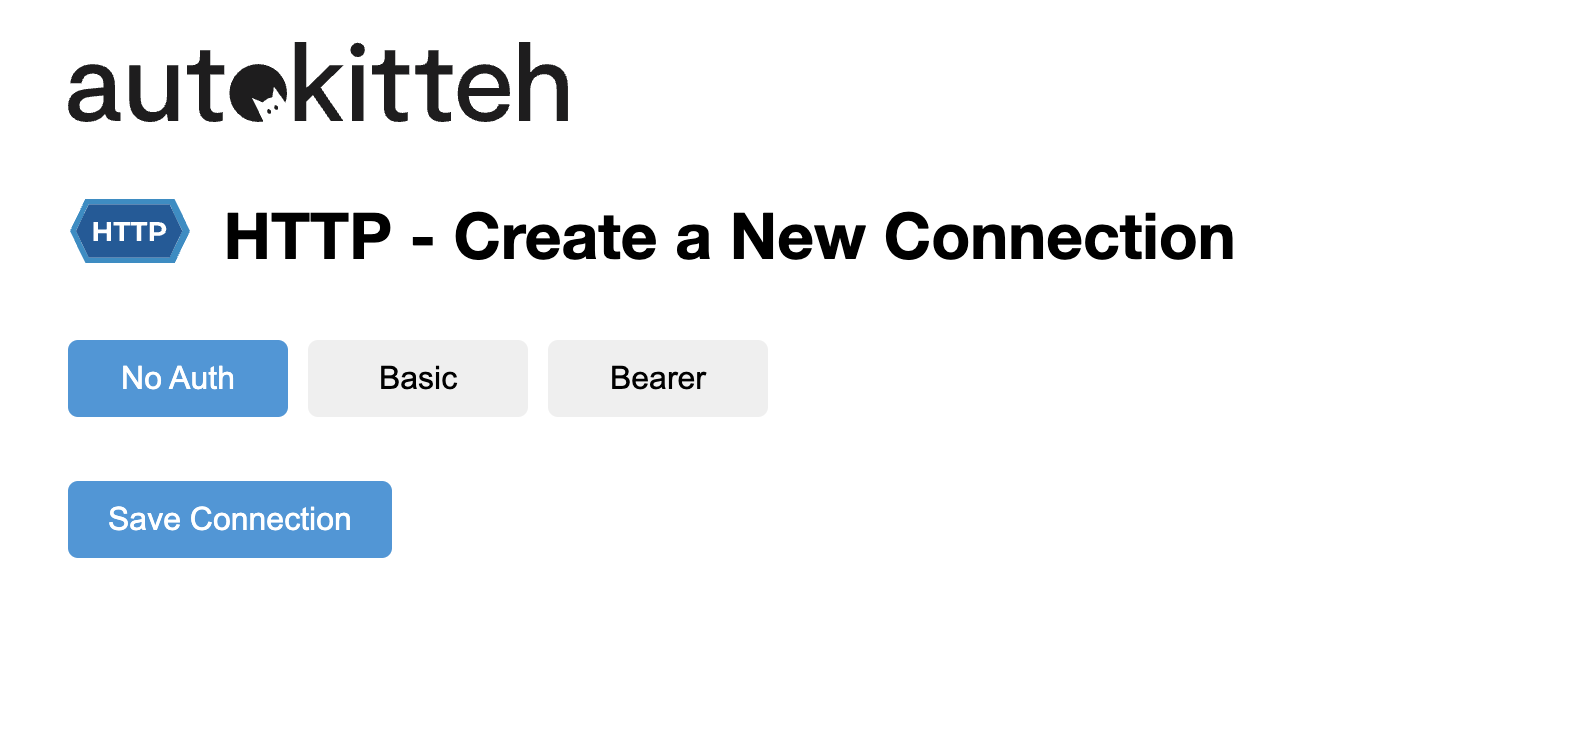
A web page will be opened where you can configure the secrets for the connection:

Example: Create Slack Connection
To create a Slack connection for a project called py_long_cli:
ak connection create my_slack --project=quickstart --integration=slack

Connection created, but requires initialization. Please run this to complete: ak connection init con_01j1cdt5vjejht3fj2neprbq5y
connection_id: con_01j1cdt5vjejht3fj2neprbq5y
Use this command to initialize the Connection:
ak connection init con_01j1cdt5vjejht3fj2neprbq5y
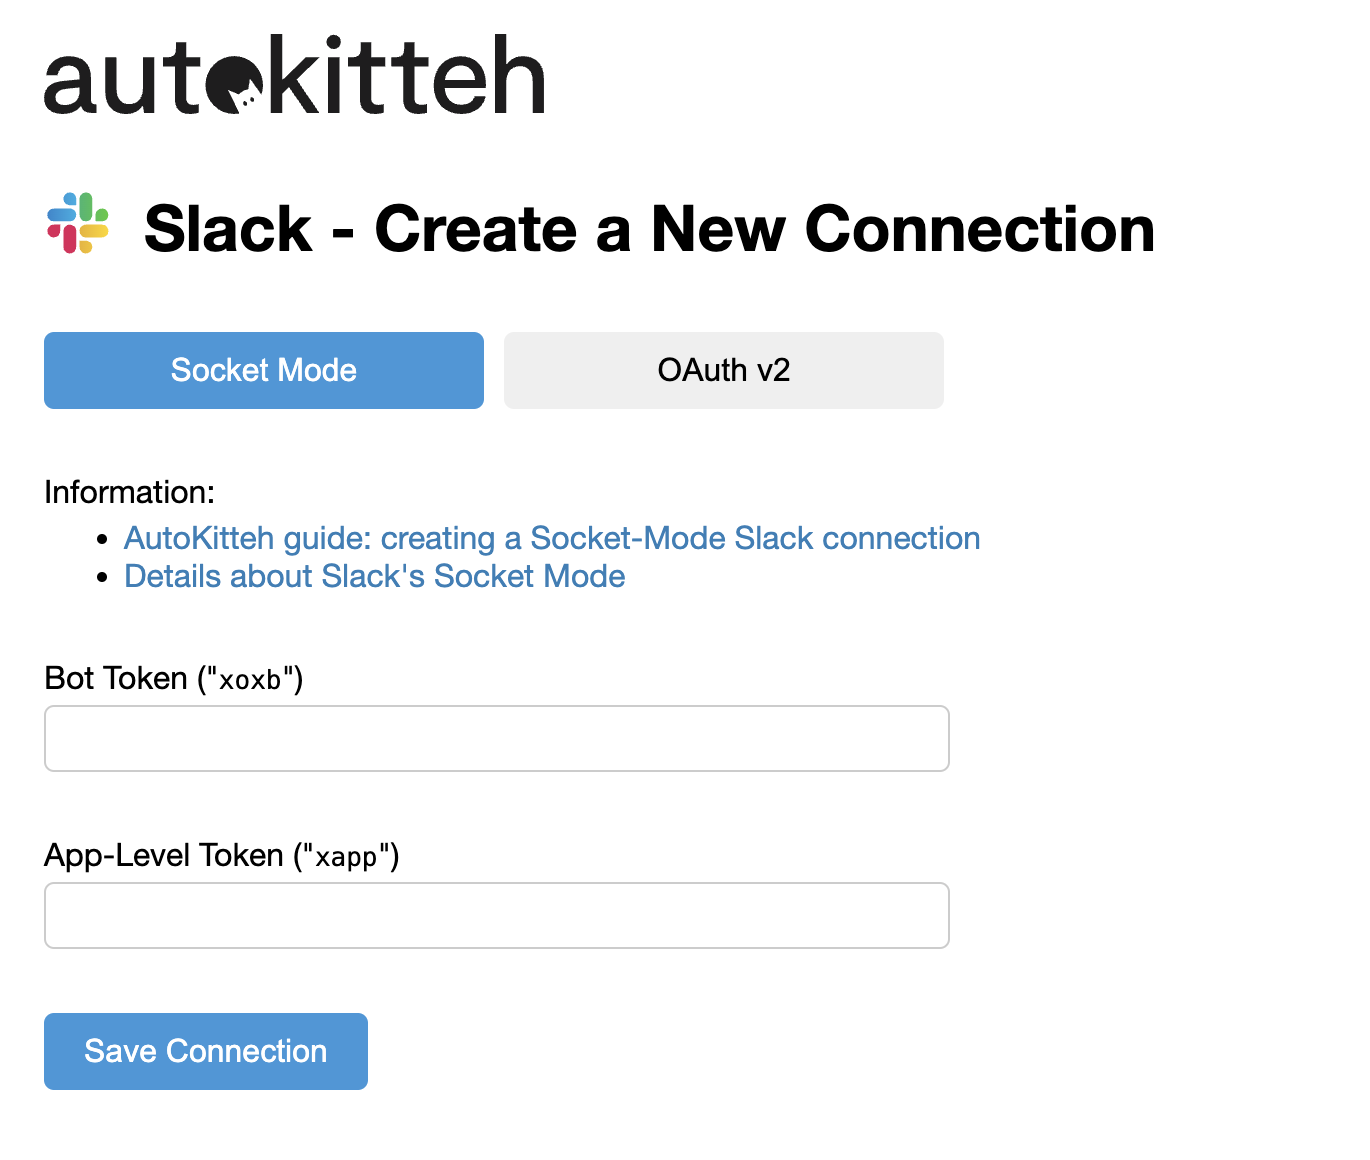
Now, AutoKitteh will open a browser for configuring the Connection, as shown below. Enter the required values and press Save Connection.

To view Connection status:
ak connection get con_01j1cdt5vjejht3fj2neprbq5y -J

{
  "connection": {
    "connection_id": "con_01j1cdt5vjejht3fj2neprbq5y",
    "integration_id": "int_3kth0s1ack11ff592f6e048923",
    "project_id": "prj_01j1ccr7w2ek7ak4fm0bba9sn4",
    "name": "my_slack",
    "status": {
      "code": "CODE_WARNING",
      "message": "init required"
    },
    "capabilities": {
      "supports_connection_init": true,
      "requires_connection_init": true
    },
    "links": {
      "init_url": "/connections/con_01j1cdt5vjejht3fj2neprbq5y/init",
      "self_url": "/connections/con_01j1cdt5vjejht3fj2neprbq5y"
    }
  }
}
Note that the status field indicates the status of the connection.
Creating a Trigger
A Trigger in a project connects an incoming event to an entry point in the code file.
To create a Trigger:
ak trigger create -n name --call file:func [-p project] [-e env] -c connection [-E event] [-f filter] [--data key=value]...
Webhook Triggers
A Trigger linked to a webhook requires: Name - arbitrary name for the trigger (must be unique in project)
Call - defines the entry point in the format of: <File name>:function name>.
Project - name of the project in which the trigger is created
Connection - the name of the Connection linked to this Trigger
Env- the environment (optional), it is “default” if not specified
Even (optional): event type. For instance, get or put in case of HTTP. Values for Event type differ by Connection/Integration type
Filter (optional) - the filter to apply for the received event. Only events that pass the filter will trigger the event
Data (optional) - For some connections, additional information is required. For example: for webhooks on HTTP connections, you need to specify the endpoint that will respond to the webhook. The format is:
[domain]:9980/[integration name]/[project name]/path
ak trigger create -n http_trigger --call program.py:on_http_request -p quickstart -c http_get -E get --data path=trigger_path

trigger_id: trg_01j1cjrxayfnrvjb5rwxh3vfmj
Creating Schedule
To create a Scheduler
create -n name --call file:func [-p project] [-e env] -s "schedule"
Example:
List All Triggers
ak trigger list -J

{
  "trigger_id": "trg_01j1ch3szjewvs5jwpj4k0217k",
  "name": "http_get",
  "connection_id": "con_01j1ch3szfeepv4rsw8t7e8jte",
  "env_id": "env_01j1ccr7w2ekjsjqaeq5azqzfq",
  "event_type": "get",
  "code_location": {
    "path": "program.py",
    "name": "on_http_request"
  },
  "data": {
    "path": {
      "string": {
        "v": "trigger_path"
      }
    }
  }
}
Setting Variables (Optional)
You can configure variables to be used for all project sessions. Use the command format below to set, get and delete variables:
ak var set <key> [<value>] [--secret] <--env=.. | --connection=....> [--project=...]
Example of Working with Variables:
ak var set MY_VAR test --project=quickstart
To see the values of a project variables:
ak var get MY_VAR -p=quickstart

MY_VAR="test"
Building a Project
After you complete the setup, you need to build your project. This in effect compiles the project. Perform this step as part of your development process so that you can check for errors in the project setup.
The Build process does not check the dependencies of the overall project. For example, it does not confirm that a connection referenced in the project code actually exists. This type of error is only detected during runtime.
To build a project:
ak project build <project name or ID> [--dir <path> [...]] [--file <path> [...]]
The path is the directory in which all project files are located. Alternatively, you can provide a list of files with the path for each file.
Example:
ak project build quickstart --dir ./quickstart

build_id: bld_01j1ckavg0f9m9hk3akvpjb8wn
Deploying a Project
A project deployment is the bundle of all components required for the project's execution. It contains: compiled code, files, connections, triggers, and variables. You can think of a deployment as a version of your project.
Once deployed, a project is ready to be triggered by external events.
By default, a new deployment of a project that is already running will change the state of the previous deployment to Draining. This means that new events will not trigger new sessions for that deployment, but sessions that have already been triggered will continue until complete or stopped.
To create a deployment:
ak project deploy <project name or ID> [--dir <path> [...]] [--file <path> [...]] [--env <name or ID>]
Example:
ak project deploy quickstart --dir ./quickstart

build_id: bld_01j1ckfz0qf14s4735g1tpphc4
deployment_id: dep_01j1ckfz0tek98p834aenejdjk
To view the list of deployments:
ak deployment list
Note that state is listed for each. For example, DEPLOYMENT_STATE_ACTIVE
A project can have only one active deployment. But, you have full control over the project's versions by using the following commands:
ak deployment activate <deployment ID>
ak deployment deactivate <deployment ID>
ak deployment delete <deployment ID>
ak deployment drain <deployment ID> (which means that the deployment will stop triggering new sessions)
Summary - Creating and Deploying a Project End-to-End
Base on the quickstart project as example, here is how to build it:
ak project create --name=quickstart
ak connection create my_http --project=quickstart --integration=http
ak trigger create -n http_trigger --call program.py:on_http_request -p quickstart -c http_get -E get --data path=trigger_path
ak project build quickstart --dir ./quickstart
ak project deploy quickstart --dir ./quickstart
Now that the project is deployed, an HTTP request on the port defined will trigger the workflow.
Trigger the project:
curl -X GET http://localhost:9980/http/quickstart/trigger_path
Managing Sessions
A session is a single execution of an automation upon its initiation, either by scheduler or webhook. When the Trigger is received the code begins execution from the defined entry point and continues running until the termination of the code.
To manage sessions use the various forms of the command:
ak session
delete Delete non-running session
get Get session configuration details (entry-point, inputs, etc.)
list List all sessions
log Get session runtime logs (prints, calls, errors, state changes)
restart Start new instance of existing session
start Start new session
stop Stop running session
test Test a session run
watch Watch session runtime logs (prints, calls, errors, state changes)
To see a list of all sessions:
ak session list -J

{
  "session_id": "ses_01j1ckn66vfvjbapax4qp2608v",
  "build_id": "bld_01j1ckfz0qf14s4735g1tpphc4",
  "env_id": "env_01j1ccr7w2ekjsjqaeq5azqzfq",
  "entrypoint": {
    "path": "program.py",
    "name": "on_http_request"
  },
  "created_at": "2024-06-27T10:25:30.843978Z",
  "updated_at": "2024-06-27T10:25:31.051955Z",
  "state": "SESSION_STATE_TYPE_ERROR",
  "deployment_id": "dep_01j1ckfz0tek98p834aenejdjk",
  "event_id": "evt_01j1ckn66ee0dr333tkh7jkvtq"
}
To view session logs:
ak session log [sessions ID] [--fail] [--skip <N>] [--no-timestamps] [--prints-only]
ak session log ses_01j1ckn66vfvjbapax4qp2608v --prints-only

[2024-06-27 10:43:03.940901 +0000 UTC] [stdout] Received HTTP GET request with data: {'data': {'body': None, 'headers': {'Accept': '*/*', 'User-Agent': 'curl/8.1.2'}, 'method': 'GET', 'params': {}, 'path': 'trigger_path', 'url': {'fragment': '', 'host': '', 'opaque': '', 'path': '/trigger_path', 'query': {}, 'raw': '', 'raw_fragment': '', 'raw_query': '', 'scheme': ''}}}
[2024-06-27 10:43:03.940919 +0000 UTC] [stderr]
[2024-06-27 10:43:03.943055 +0000 UTC] [stdout]