Private Socket Mode Apps
Overview
Slack's "Socket Mode" allows your app to use the Events API and interactive features - without the AutoKitteh server having to expose public HTTP webhooks. Instead, AutoKitteh and Slack use a bidirectional stateful WebSocket connection.
Socket Mode helps developers working behind a corporate firewall, or who have other security concerns that don't allow exposing a static HTTP endpoint.
This connection mode does not require a preexisting AutoKitteh server-wide configuration. Instead, it allows project owners to configure the details of their own apps.
If you want to use the AutoKitteh server's default Slack OAuth v2 app, see the Default OAuth guide.
If you want to use your own OAuth v2 app, see the Private OAuth guide.
Socket Mode is available in self-hosted AutoKitteh servers but it is disabled in https://app.autokitteh.cloud/ because WebSockets are not appropriate for production-grade, high-availability use-cases:
- WebSocket connections need to remain open all the time, unlike HTTP requests to a passive webhook:
- This limits the total number of available connections per server
- This precludes stateless failover and load balancing across servers
- Ensuring that AutoKitteh doesn't miss Slack events while refreshing a WebSocket connection requires more than one WebSocket connection per AutoKitteh Slack connection
- Supporting high loads of incoming Slack events requires a dynamic pool of WebSocket connections
- Slack allows no more than 10 open WebSocket connections per app at the same time
Slack Documentation
Create a Slack App
-
Click here: create a Slack app
-
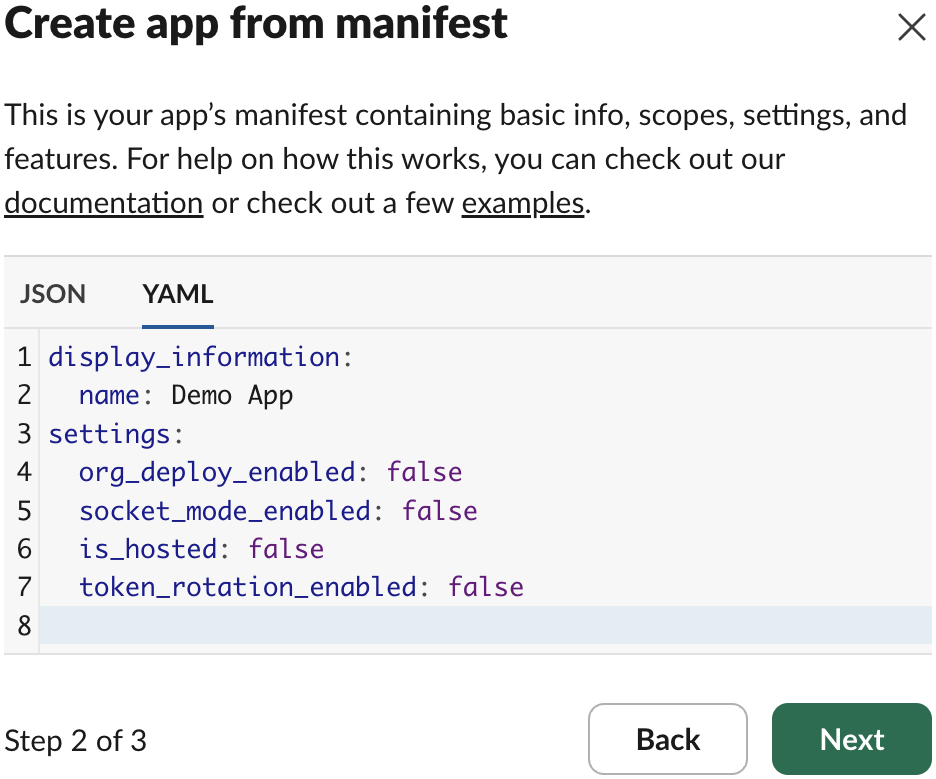
Select the option "From a manifest"
-
Pick a workspace to develop the app in, and click the green "Next" button
-
Switch from JSON to YAML
-
Replace the default app manifest with this:
display_information:
name: AutoKitteh Demo App
features:
bot_user:
display_name: AutoKitteh
always_online: true
slash_commands:
- command: /COMMAND-NAME
description: Send command to AutoKitteh
should_escape: true
oauth_config:
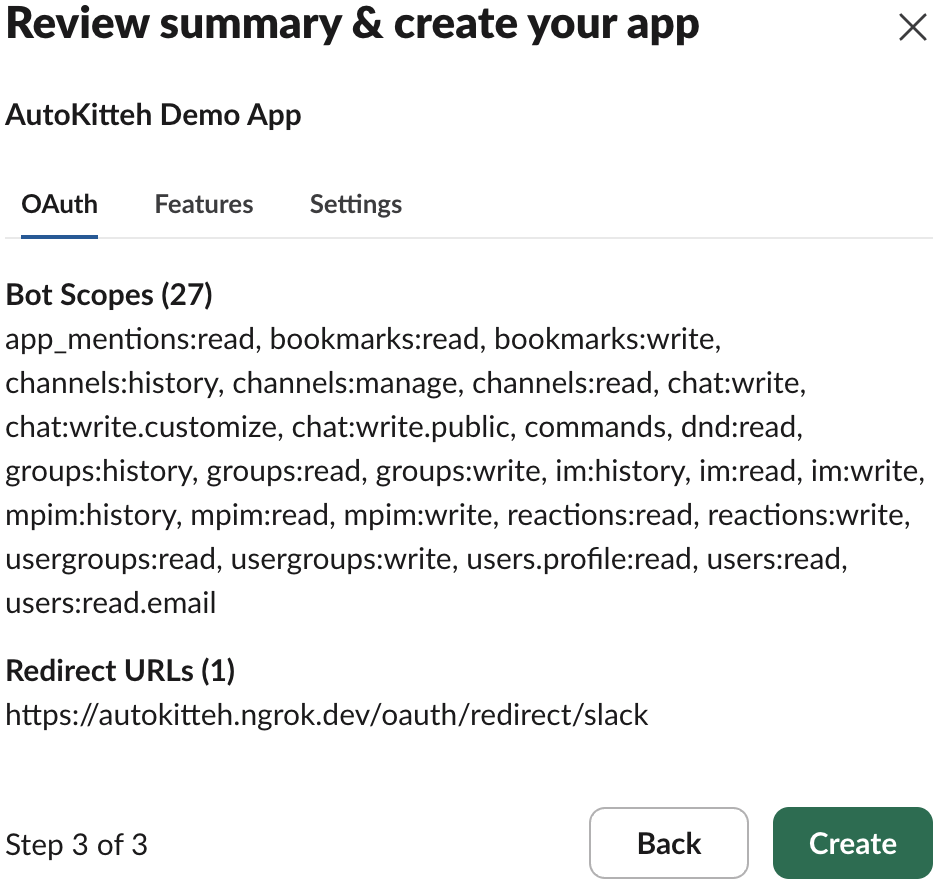
scopes:
bot:
- app_mentions:read
- bookmarks:read
- bookmarks:write
- channels:history
- channels:manage
- channels:read
- chat:write
- chat:write.customize
- chat:write.public
- commands
- dnd:read
- groups:history
- groups:read
- groups:write
- im:history
- im:read
- im:write
- mpim:history
- mpim:read
- mpim:write
- reactions:read
- reactions:write
- usergroups:read
- usergroups:write
- users.profile:read
- users:read
- users:read.email
settings:
event_subscriptions:
bot_events:
- app_home_opened
- app_mention
- app_uninstalled
- channel_archive
- channel_created
- channel_deleted
- channel_id_changed
- channel_left
- channel_rename
- channel_shared
- channel_unarchive
- channel_unshared
- group_archive
- group_deleted
- group_left
- group_rename
- group_unarchive
- member_joined_channel
- member_left_channel
- message.channels
- message.groups
- message.im
- message.mpim
- reaction_added
- reaction_removed
- tokens_revoked
interactivity:
is_enabled: true
org_deploy_enabled: false
socket_mode_enabled: true
token_rotation_enabled: false
Edit these details within the app manifest:
display_information.namefeatures.bot_user.display_name
You must also replace the string COMMAND-NAME within the app manifest with the app's actual slash command name:
features.slash_commands[*].command
Slash command names must be unique within a Slack workspace, do not install more than one Slack app with the same slash command name!
This is because Slack sends slash command events only to the last-installed app which declared that slash command, not all of them.
Slash commands are an optional feature - you may remove the one in the template, or add multiple ones.
Scopes are permissions that your app requires:
- The template above includes a wide range of them - you may add and remove any based on your functional and security needs
- However, do not remove the
users:readscope! (AutoKitteh requires it during connection initializations) - Also, do not remove the
commandsscope if you use slash commands! - For more details on Slack scopes, see: granular bot permission scopes
Bot events are asynchronous notifications that your app subscribes to receive:
- The template above includes a wide range of them - you may remove any based on your functional needs
- Contact us if you need to add new events that AutoKitteh does not support yet
-
Click the green "Next" button
-
Click the green "Create" button
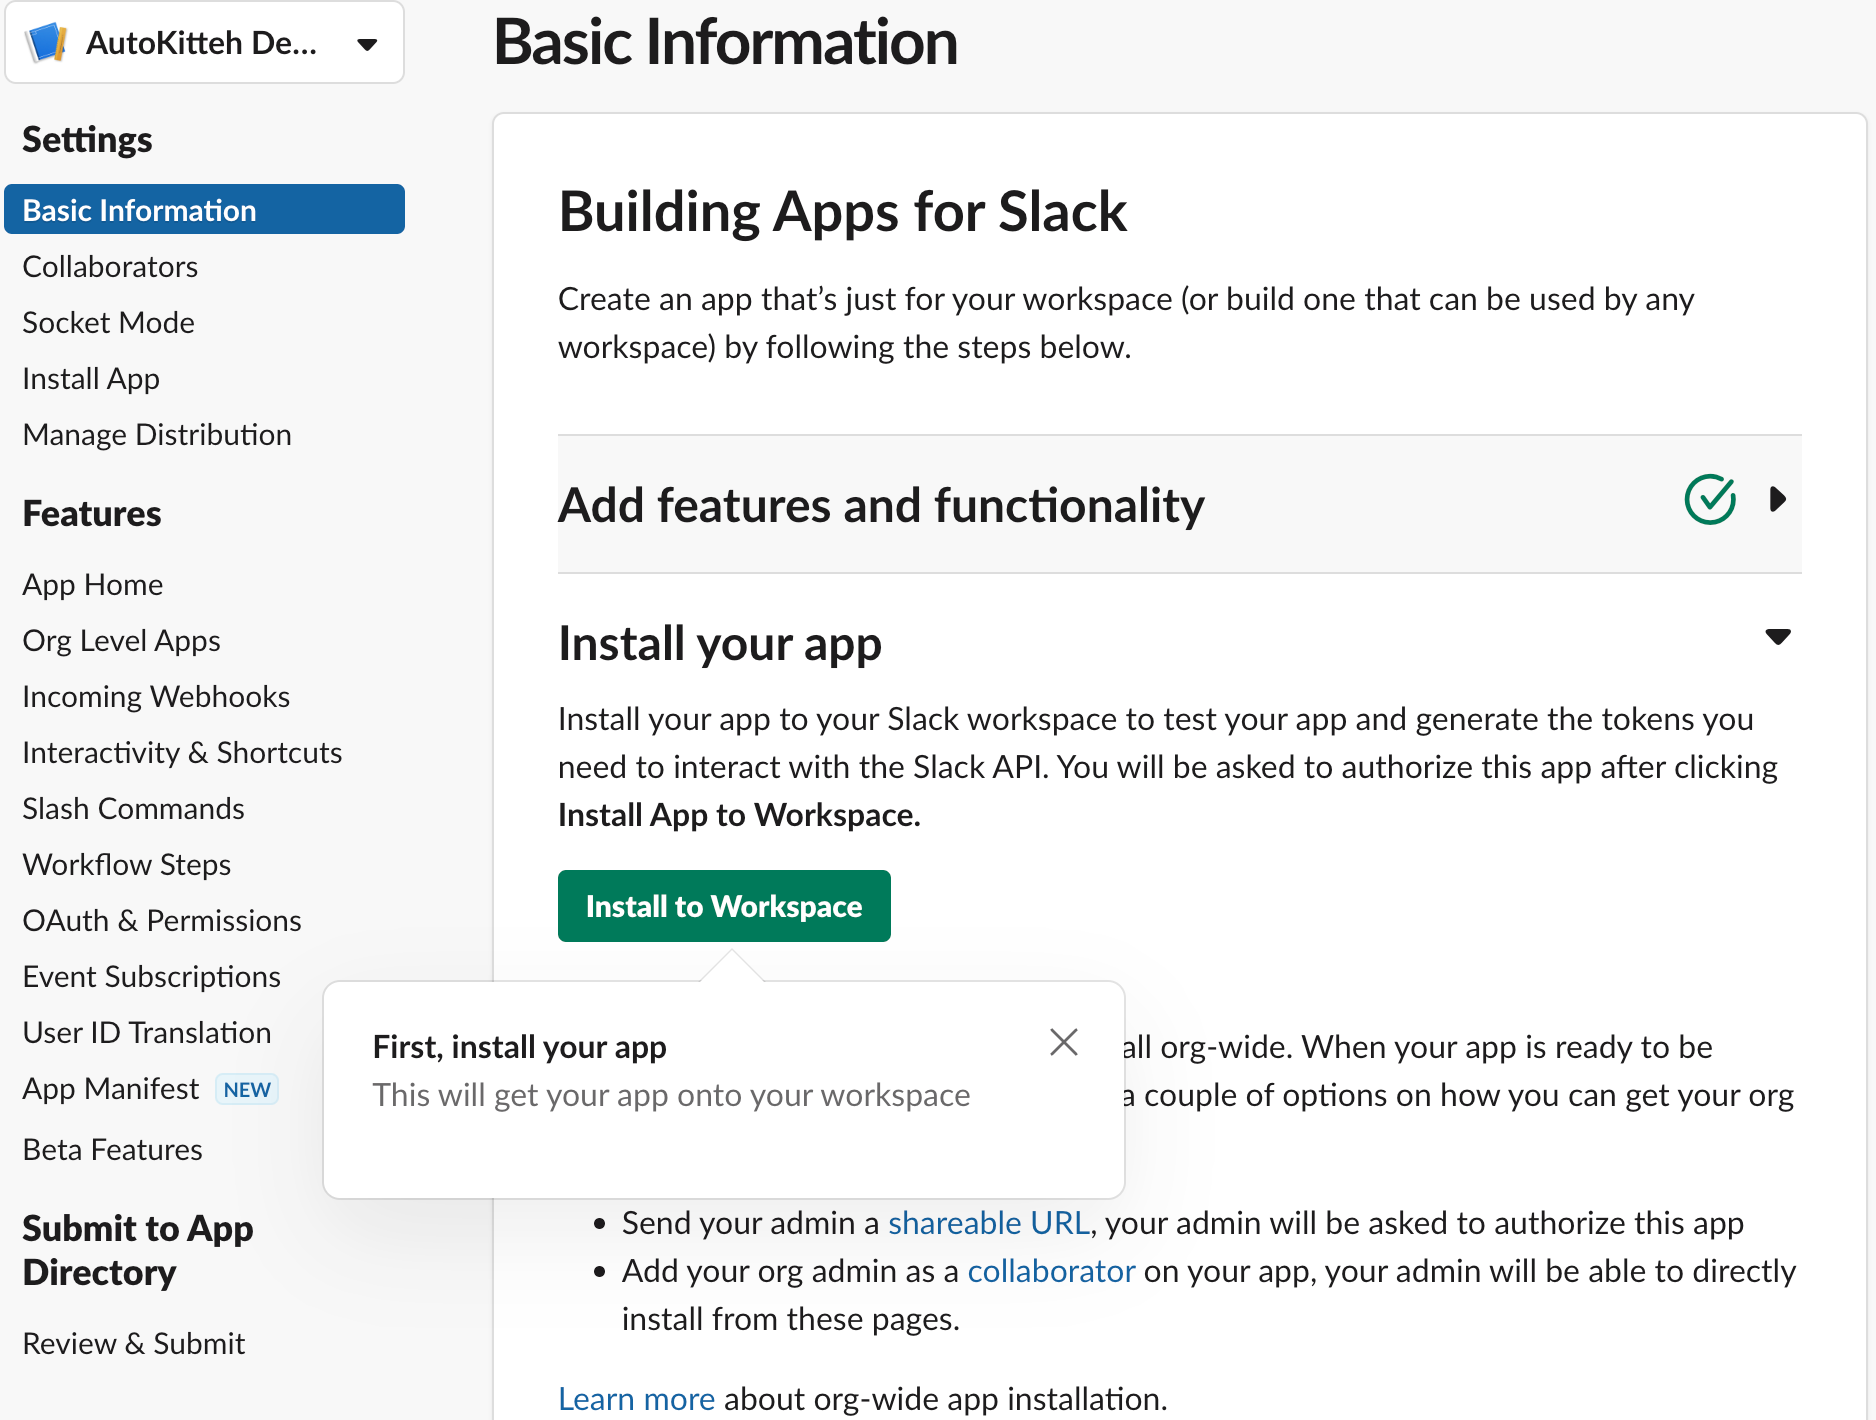
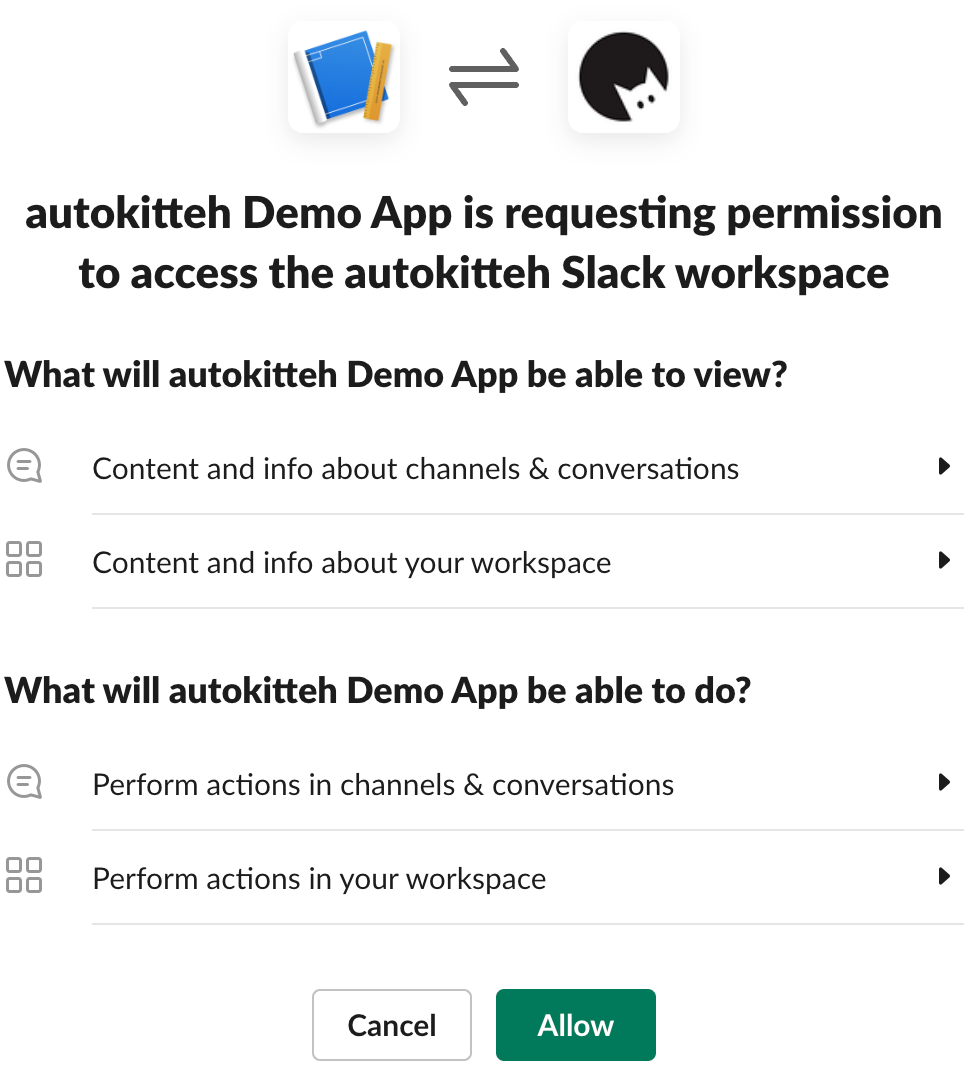
Install the Slack App
-
Click the green "Install to Workspace" button
-
Click the green "Allow" button
Post-Creation Settings
-
In the app's "Basic Information" page, scroll down to the "App Credentials" section
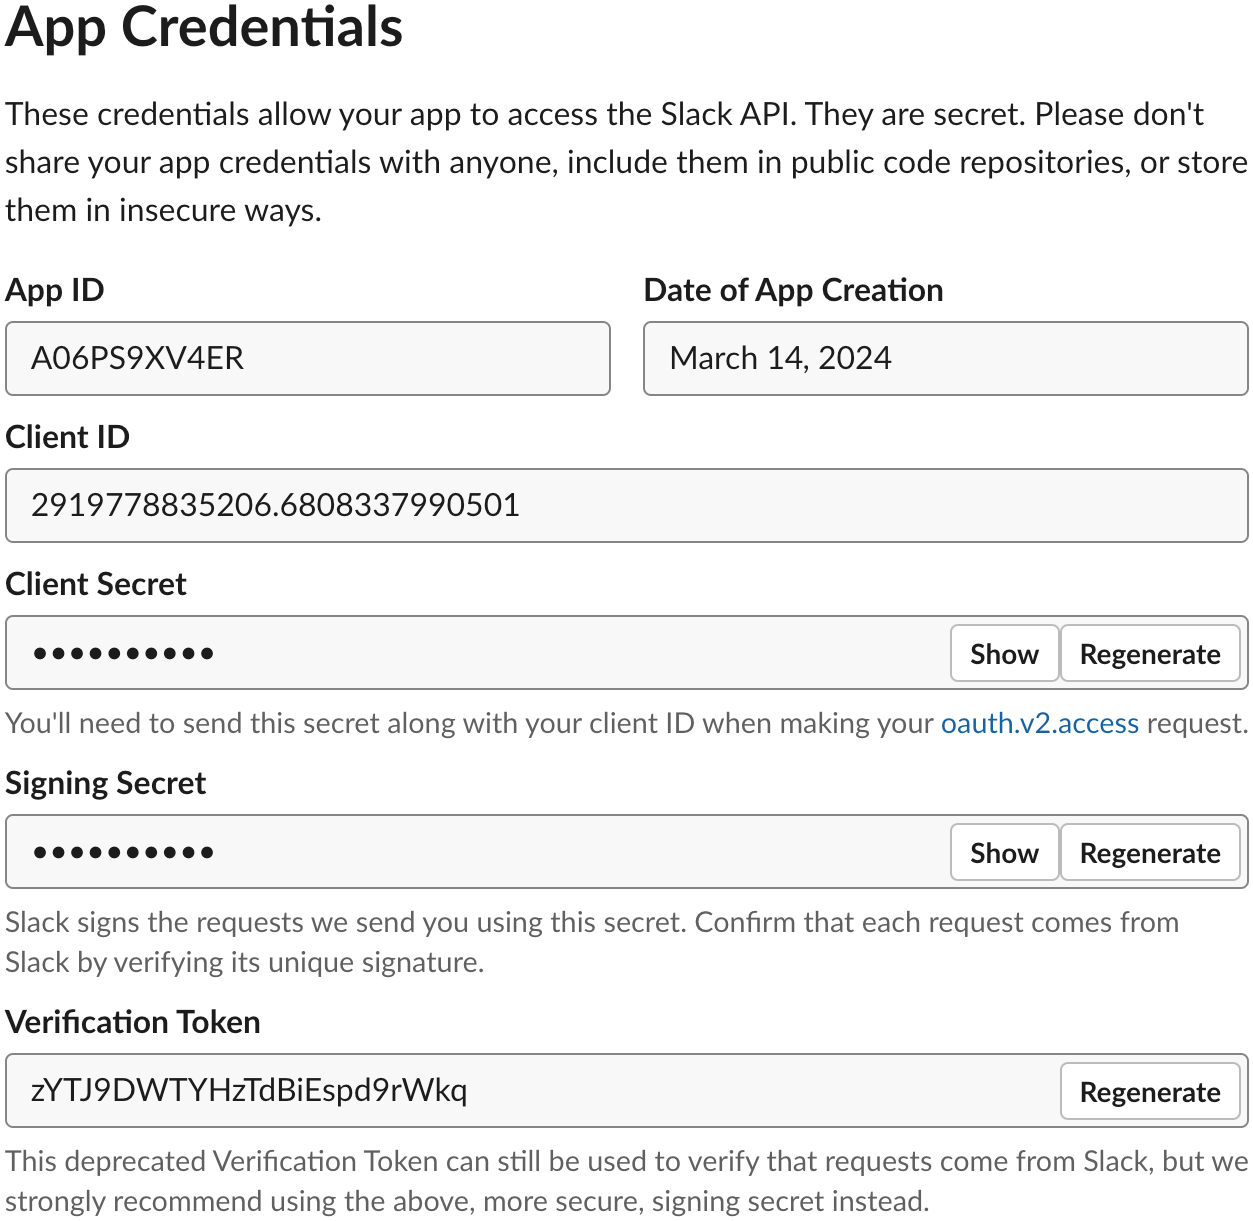
-
In the app's "Basic Information" page, scroll down to the "App-Level Tokens" section
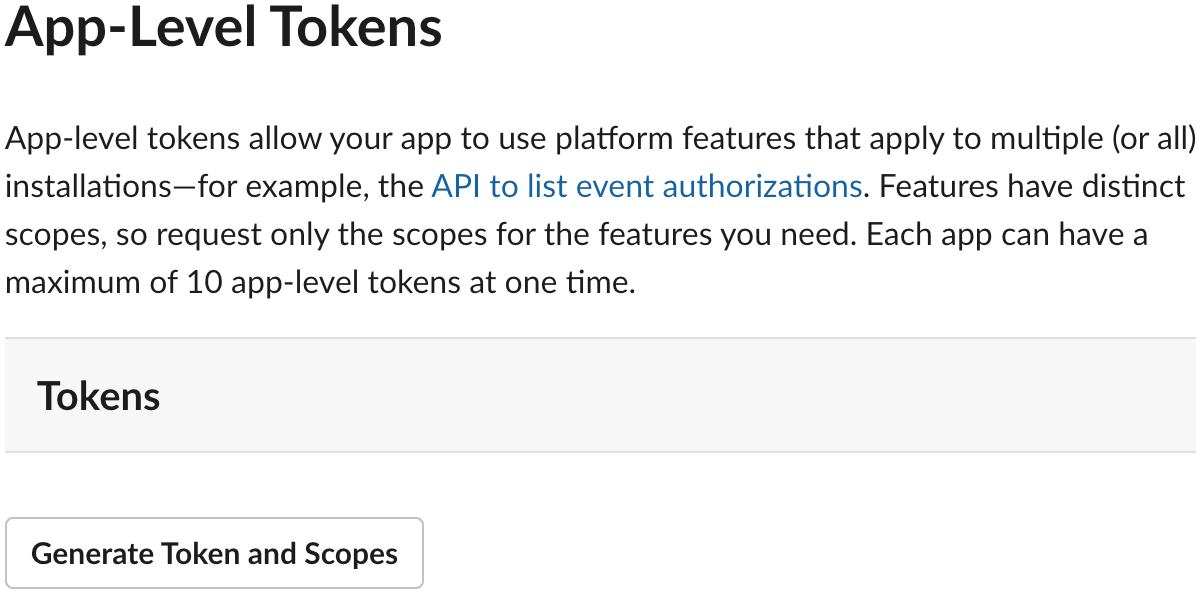
-
Click the "Generate Token and Scopes" button
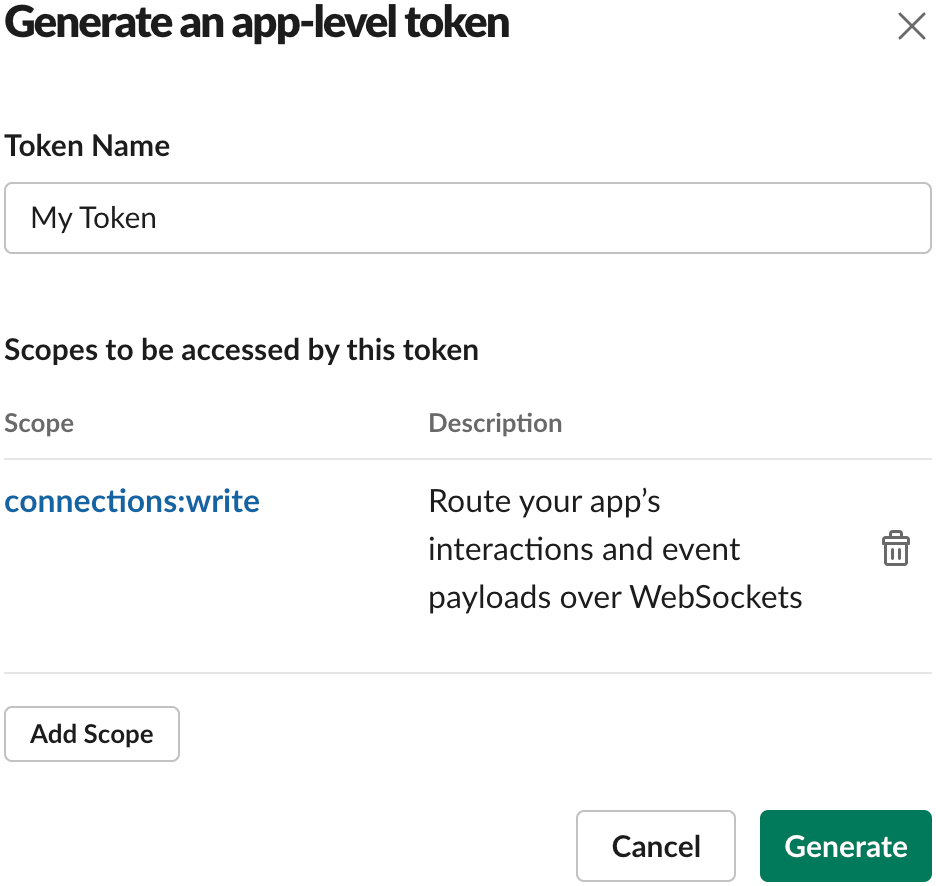
- Type a name for the token
- Click the "Add Scope" button
- Select the connections:write scope
- Click the green "Generate" button
-
Click the "Copy" button to copy the app-level token (
xapp) for later, and click the "Done" button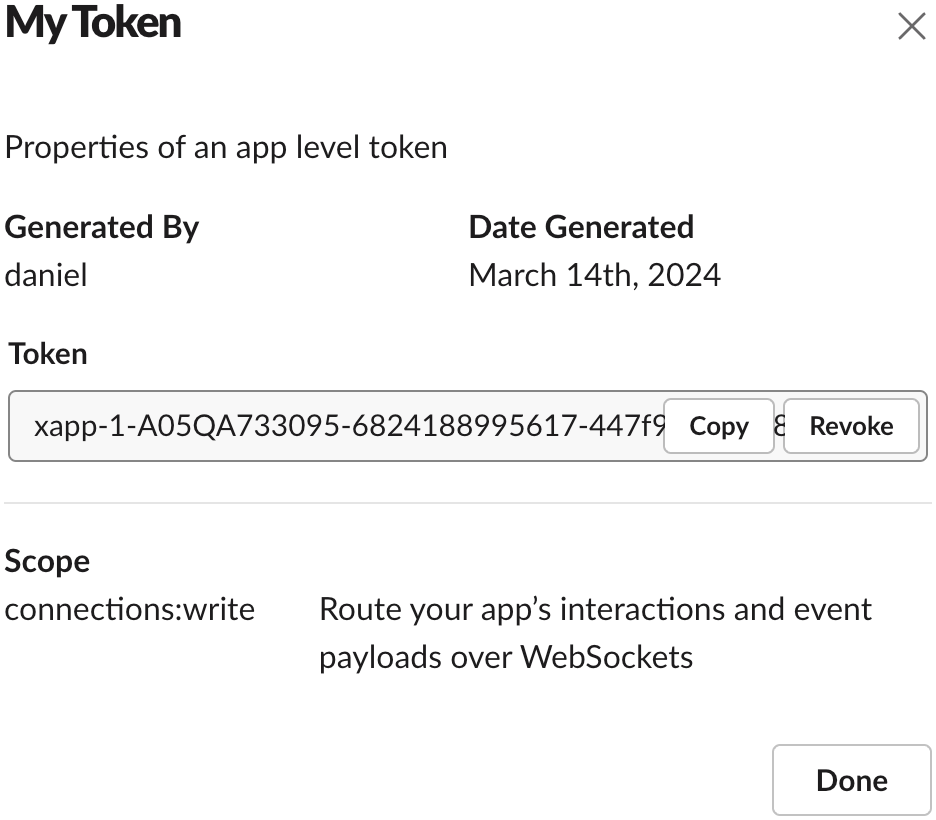
-
Click "Install App" under "Settings" in the left sidebar, and then click the "Copy" button to copy the bot token (
xoxb) for later
-
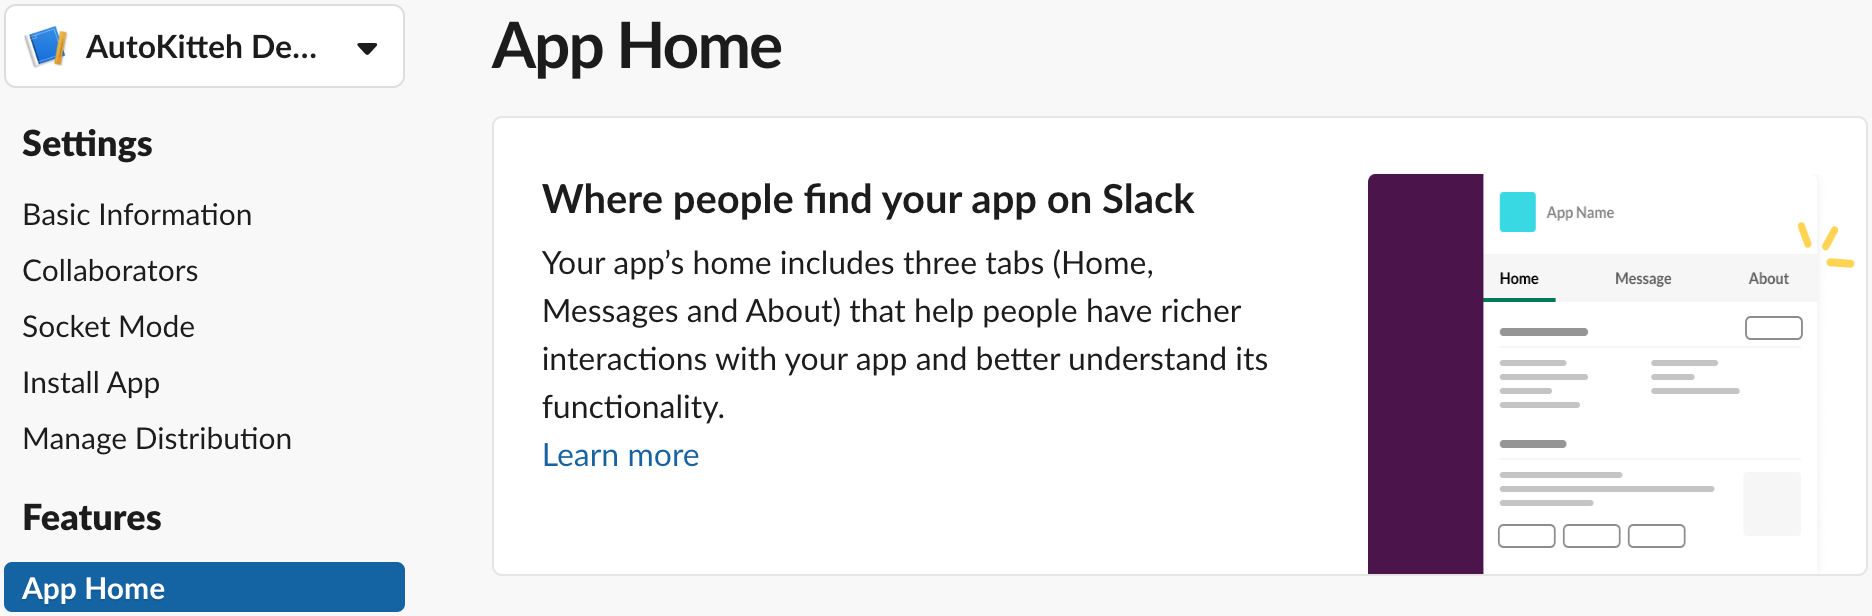
Click "App Home" under "Features" in the left sidebar
-
Scroll down the page to the "Show Tabs" section, and check the checkbox "Allow users to send Slash commands and messages from the messages tab"
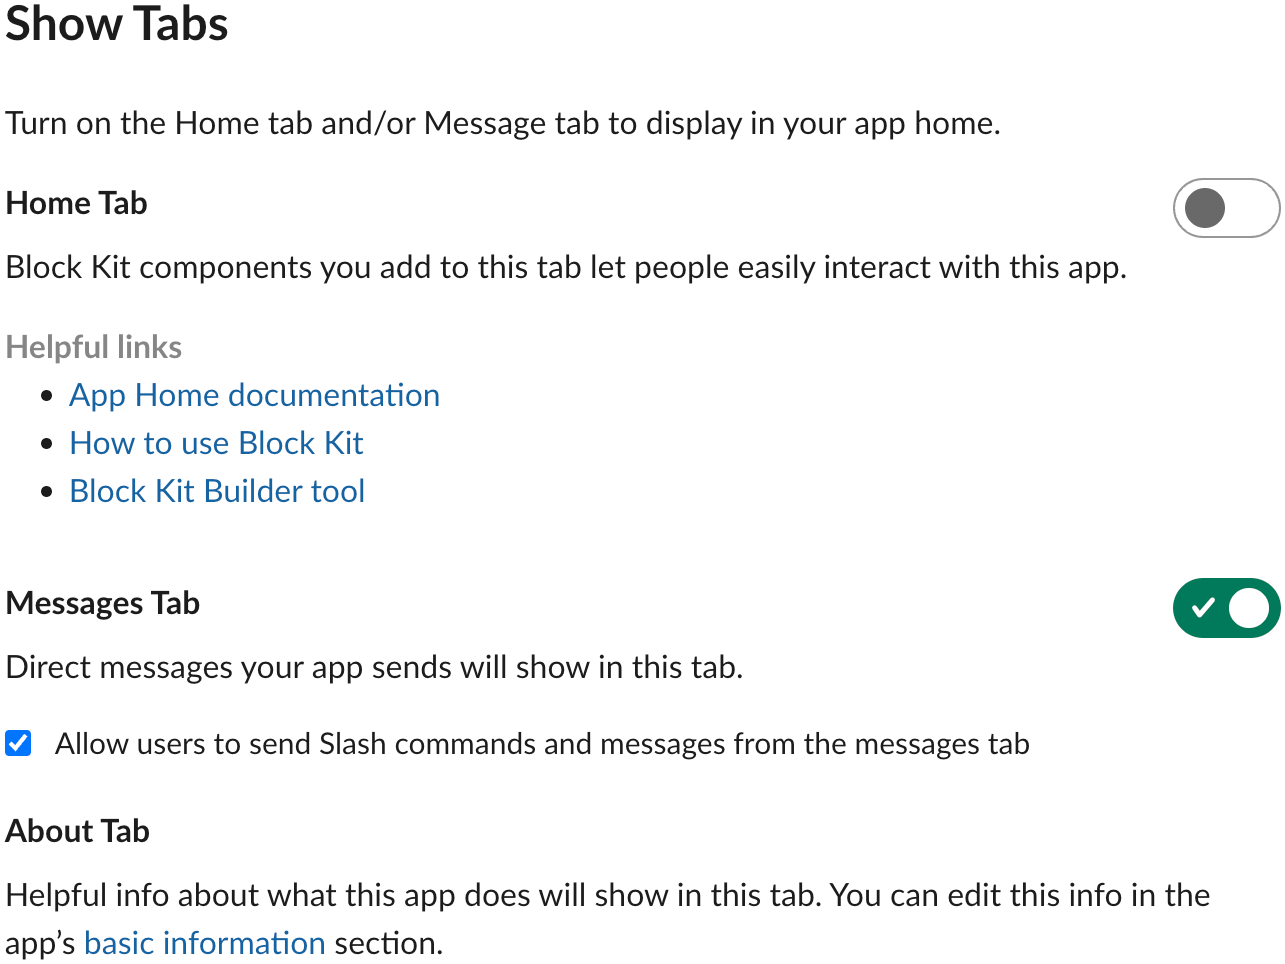
This is optional, but recommended for a better user experience.
AutoKitteh Connections
When you create, initialize, or edit the connection in an AutoKitteh project:
-
Select the "Slack" connection type, if not selected yet
-
Select the "Private Socket Mode app" authentication type, if not selected yet
-
Enter the app details from the previous section:
- Bot token (
xoxb, required) - App-level token (
xapp, required)
- Bot token (
-
Click the "Save Connection" button