Initialize a Socket-Mode Connection
Slack's Socket Mode allows Slack apps to use Slack's Events API and interactive features — without the AutoKitteh server having to expose public webhooks for incoming HTTP callbacks from Slack. Instead, AutoKitteh initiates a stateful WebSocket connection.
Overview
When should you use "Socket Mode"?
- AutoKitteh projects that need to be deployed behind a firewall, or have security constraints that don't allow exposing static HTTP endpoints
- AutoKitteh projects that require special Slack permissions and events (either broader or narrower than the AutoKitteh server's generic OAuth-based Slack app)
- AutoKitteh projects that require custom slash commands
When should you not use "Socket Mode"?
-
AutoKitteh projects without the limitations above, i.e. the AutoKitteh server's generic OAuth-based Slack app is configured and sufficient, so there's no need to create another Slack app from scratch
-
Production-grade, high-availability AutoKitteh projects
AttentionThere are production risks and limitations associated with "Socket Mode" connections:
-
WebSocket connections need to remain open all the time, unlike HTTP requests to a passive webhook which are transactional:
-
This limits the total number of available connections per server
-
This precludes stateless failover and load balancing across servers
-
-
Ensuring that AutoKitteh doesn't miss Slack events while refreshing a WebSocket connection requires more than one WebSocket connections per Slack connection - this is not implemented yet in AutoKitteh
-
Supporting high loads of incoming Slack events requires a dynamic pool of WebSocket connections - this is not implemented yet in AutoKitteh
-
Slack allows no more than 10 open WebSocket connections per app at the same time
-
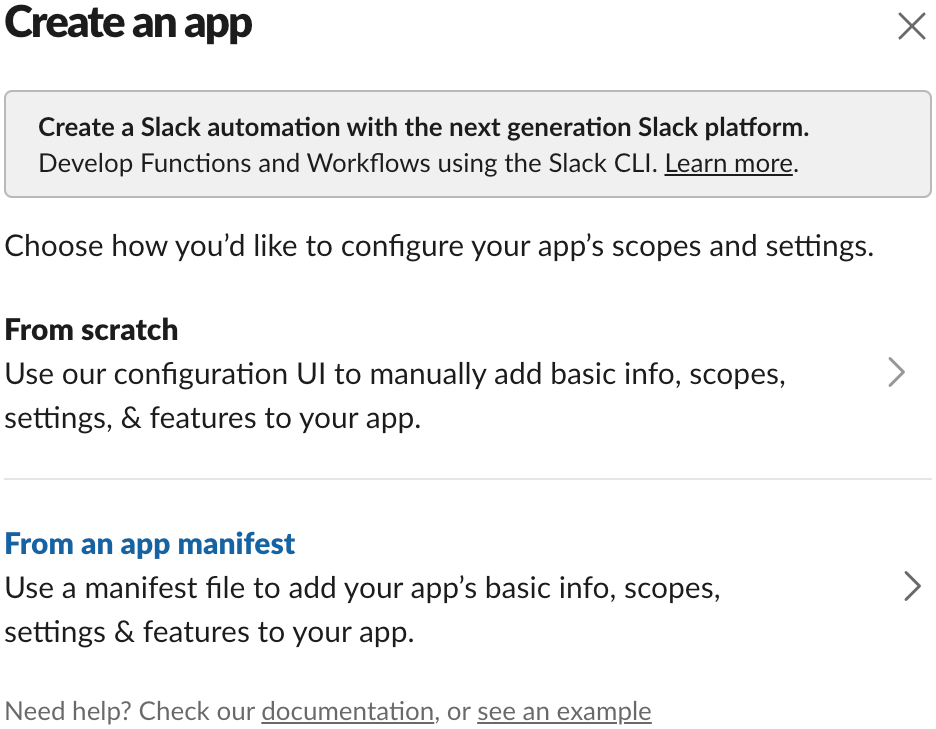
Create a Slack App
-
Click here: create a new Slack app
-
Select the option "From an app manifest"
-
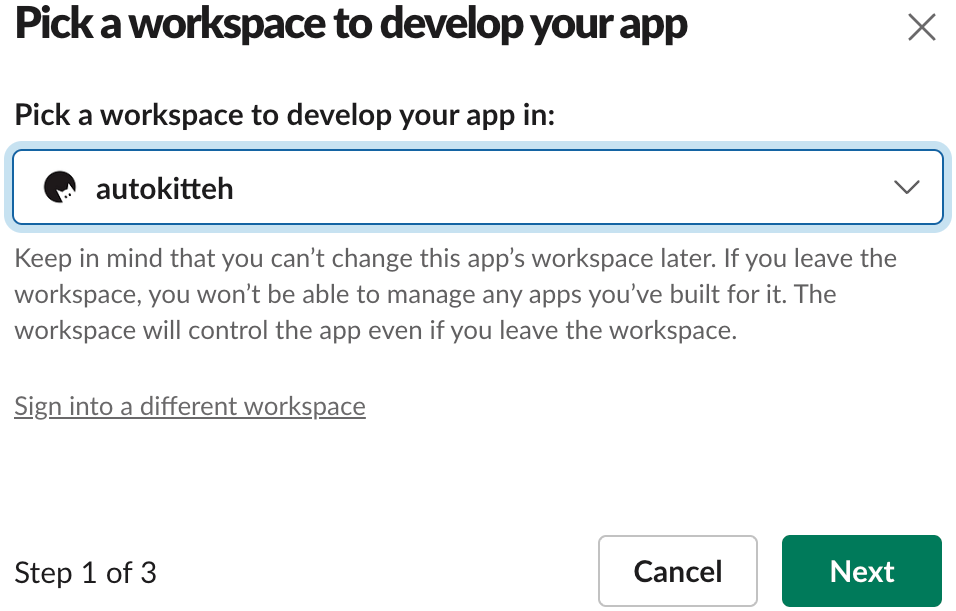
Pick a workspace to develop the app in, and click the green "Next" button
-
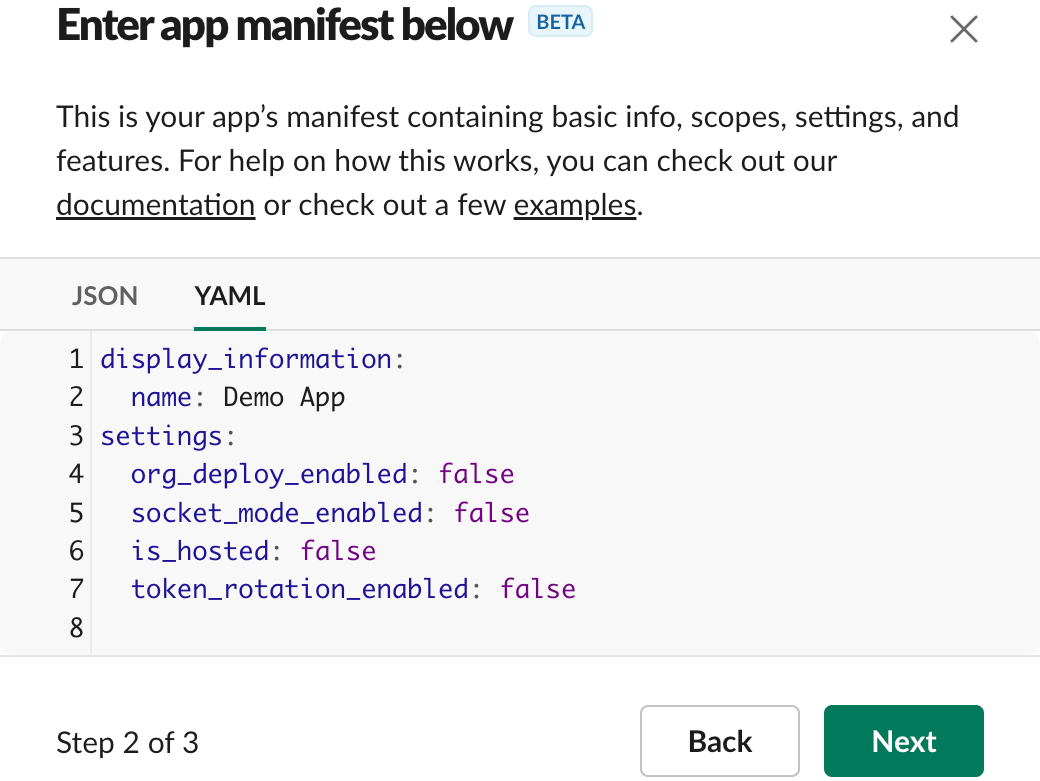
Switch from JSON to YAML
-
Replace the default app manifest YAML with this:
display_information:
  name: AutoKitteh Demo App

features:
  bot_user:
    display_name: AutoKitteh
    always_online: true
  slash_commands:
    - command: /autokitteh
      description: Send command to AutoKitteh
      should_escape: true
    - command: /ak
      description: Send command to AutoKitteh
      should_escape: true

oauth_config:
  scopes:
    bot:
      - app_mentions:read
      - bookmarks:read
      - bookmarks:write
      - channels:history
      - channels:manage
      - channels:read
      - chat:write
      - chat:write.customize
      - chat:write.public
      - commands
      - dnd:read
      - groups:history
      - groups:read
      - groups:write
      - im:history
      - im:read
      - im:write
      - mpim:history
      - mpim:read
      - mpim:write
      - reactions:read
      - reactions:write
      - users.profile:read
      - users:read
      - users:read.email

settings:
  event_subscriptions:
    bot_events:
      - app_home_opened
      - app_mention
      - app_uninstalled
      - channel_archive
      - channel_created
      - channel_deleted
      - channel_history_changed
      - channel_id_changed
      - channel_left
      - channel_rename
      - channel_unarchive
      - group_archive
      - group_deleted
      - group_history_changed
      - group_left
      - group_rename
      - group_unarchive
      - im_history_changed
      - member_joined_channel
      - message.channels
      - message.groups
      - message.im
      - message.mpim
      - reaction_added
      - reaction_removed
      - tokens_revoked
  interactivity:
    is_enabled: true
  org_deploy_enabled: false
  socket_mode_enabled: true
  token_rotation_enabled: false
-
You may edit these details within the YAML app manifest:
display_information.namefeaturesbot_user.display_nameslash_commands- add/edit/remove commands according to your preferences
oauth_config.scopes.bot- remove any scopes (i.e. permissions) that you don't want AutoKitteh to have- Warning: don't remove the scope users:read, AutoKitteh requires it to determine Slack app IDs by calling the API method bots.info
settings.event_subscriptions.bot_events- add/remove bot events according to your preferences
-
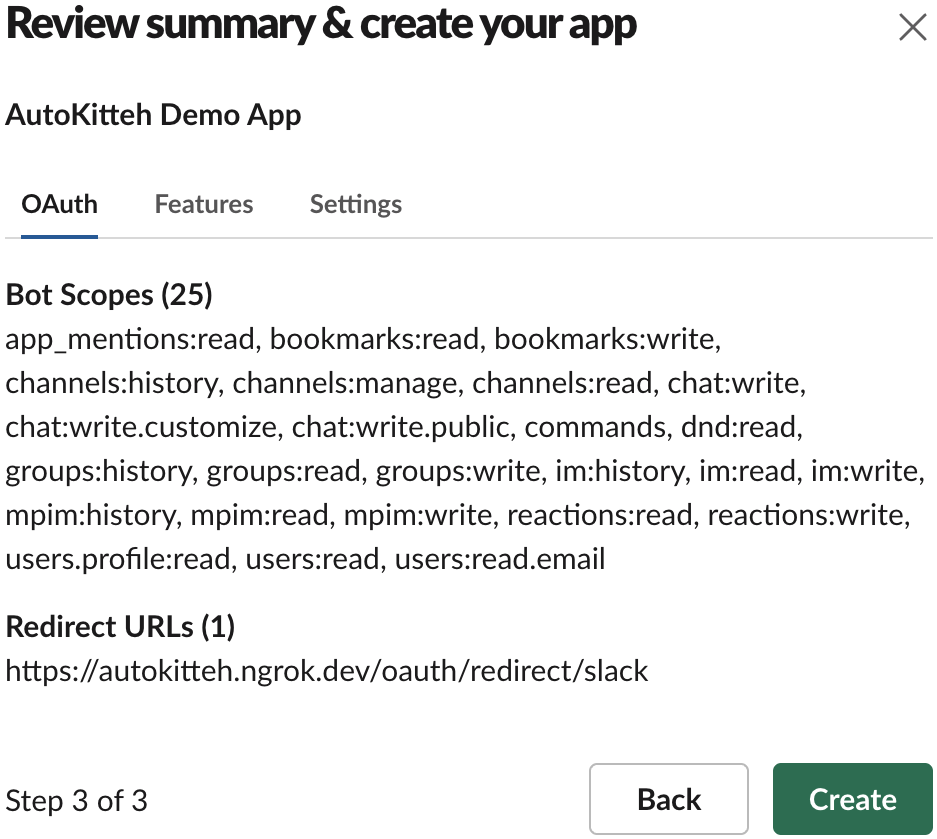
Click the green "Next" button
-
Click the green "Create" button
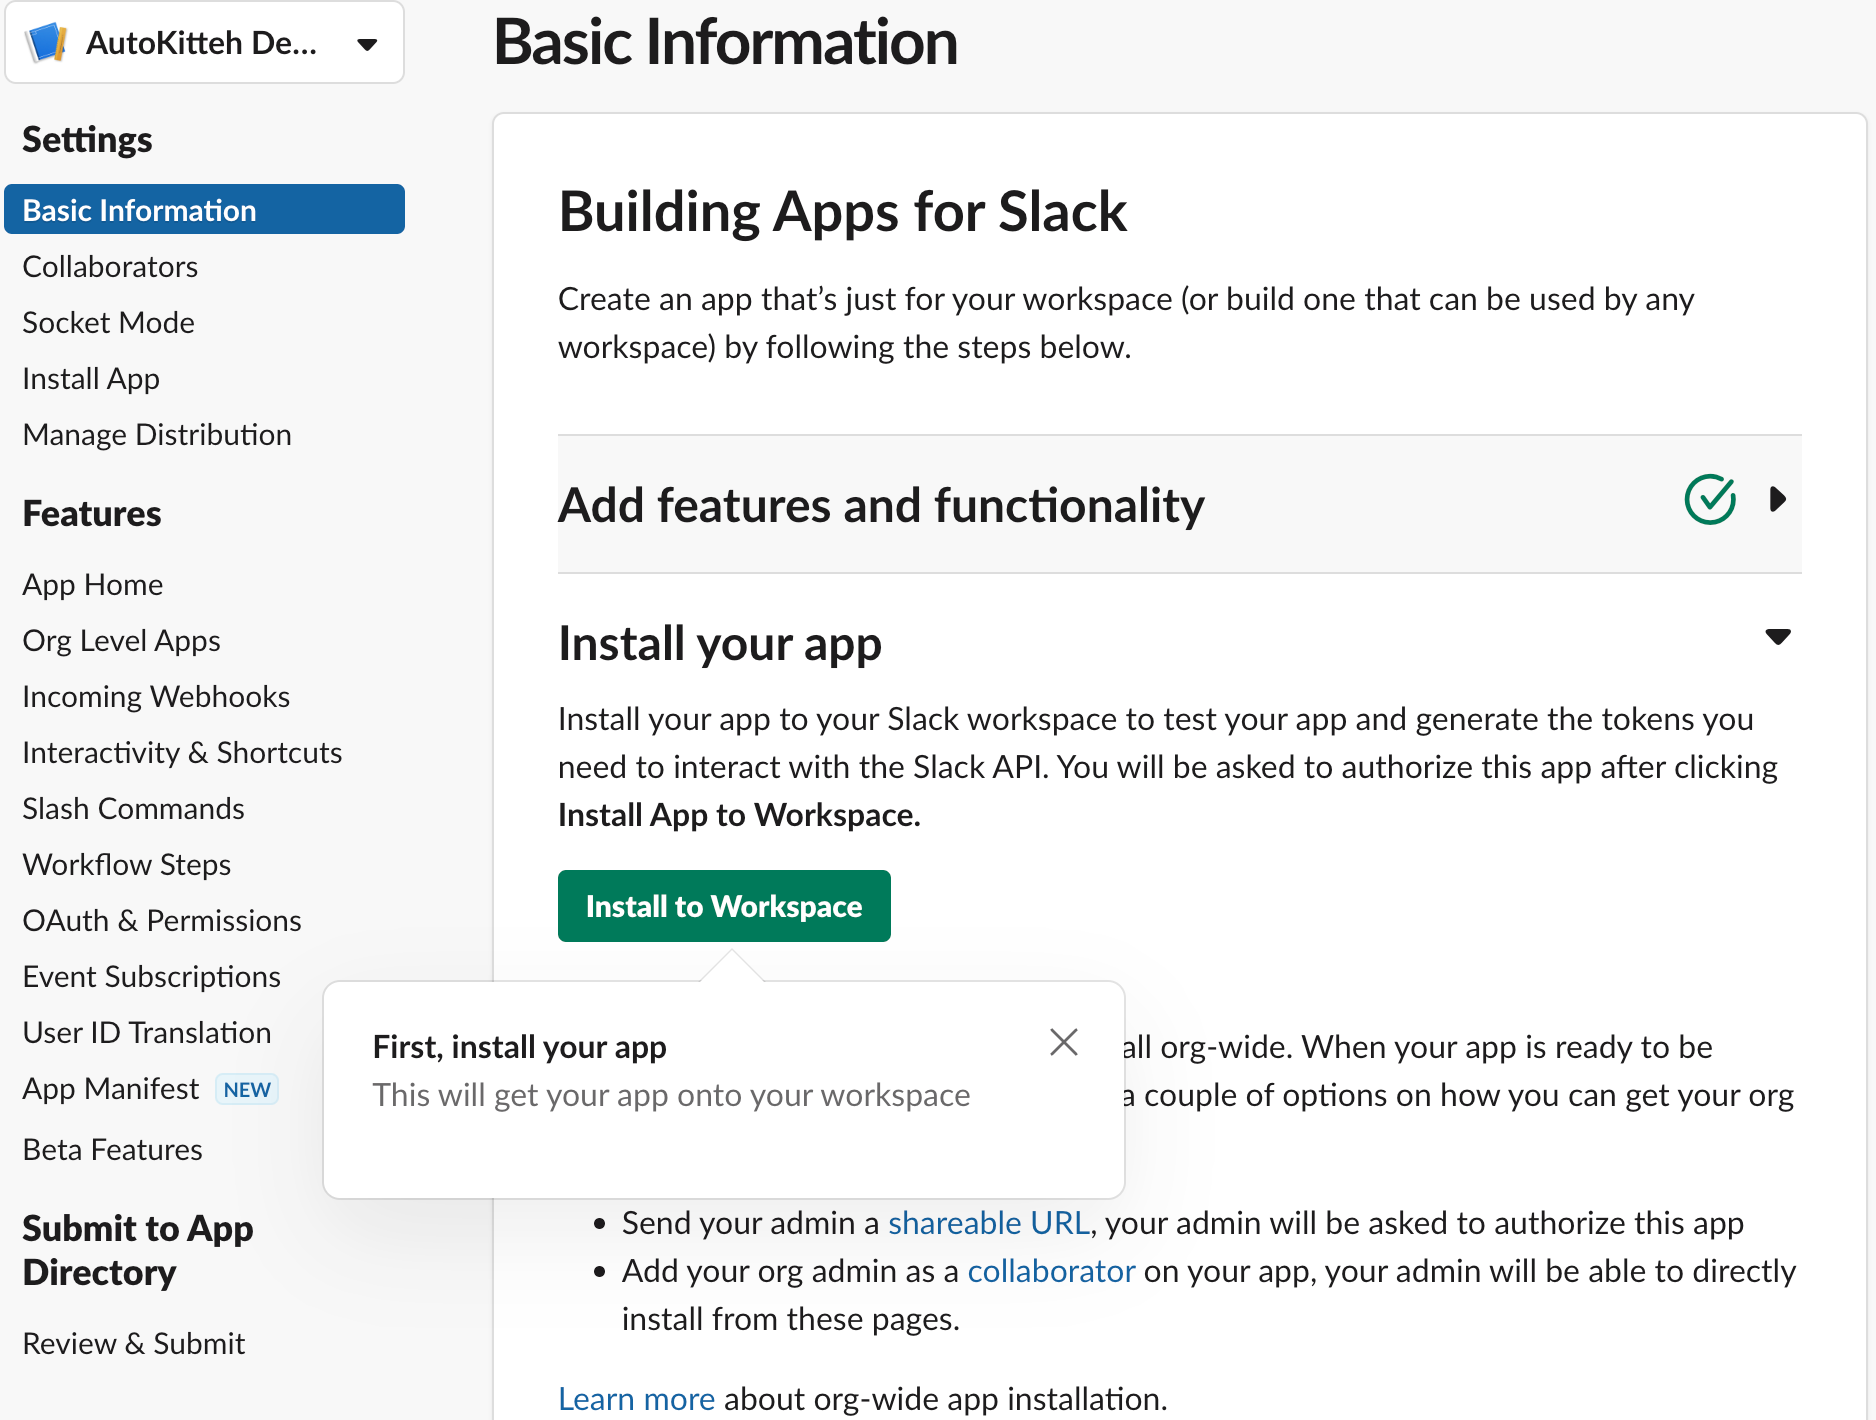
Install the Slack App
-
Click the green "Install to Workspace" button
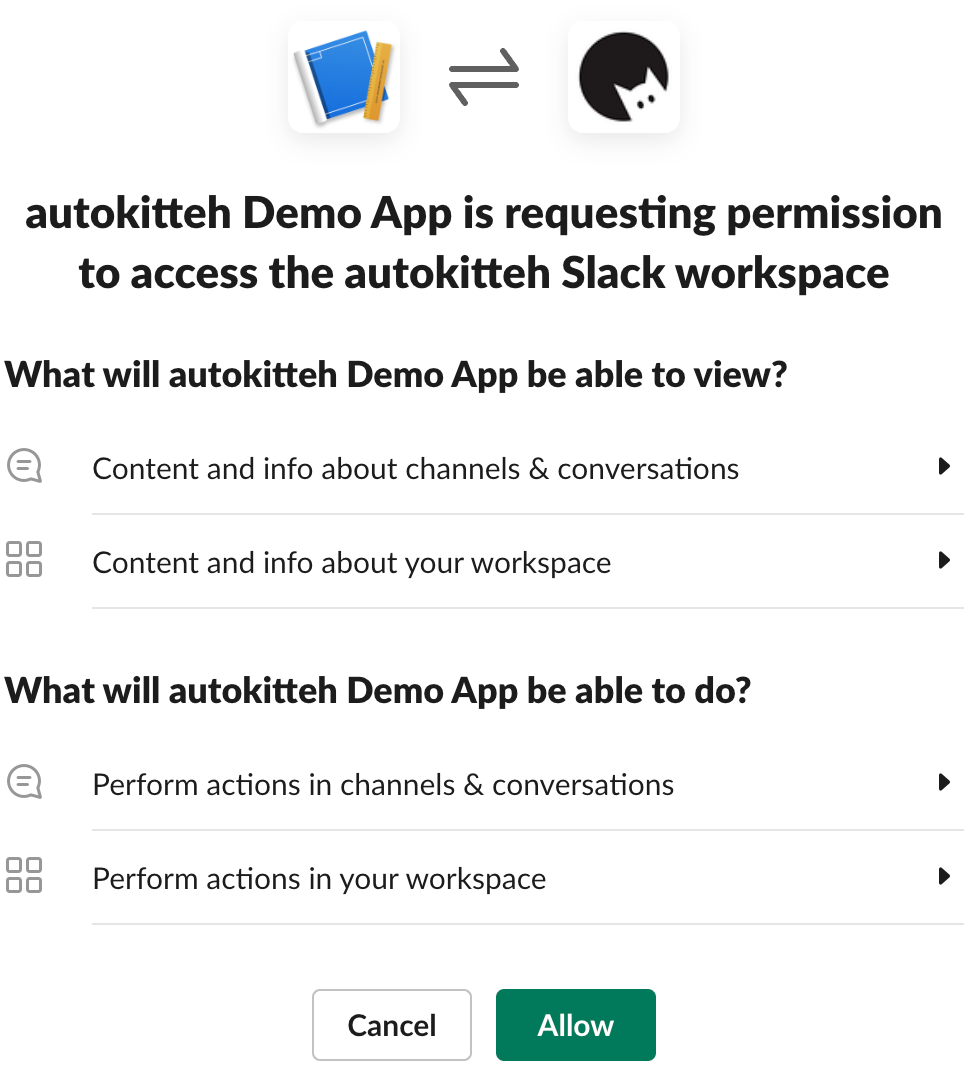
-
Click the green "Allow" button
Post-Creation Settings
-
In the app's "Basic Information" page, scroll down to the "App-Level Tokens" section
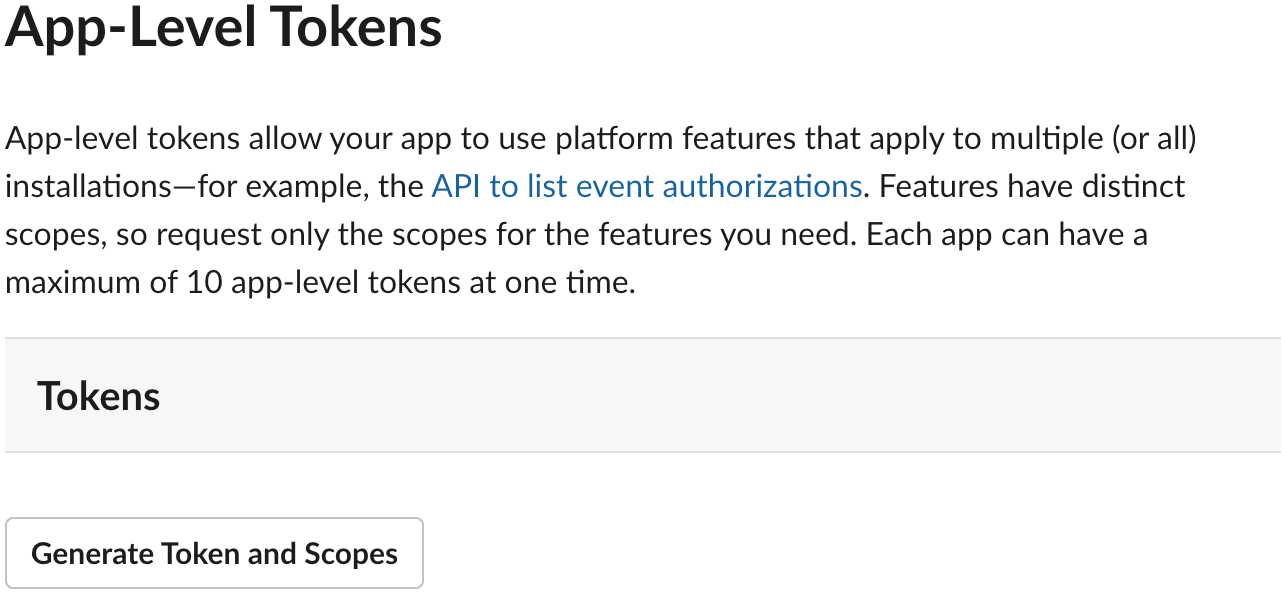
-
Click the "Generate Token and Scopes" button
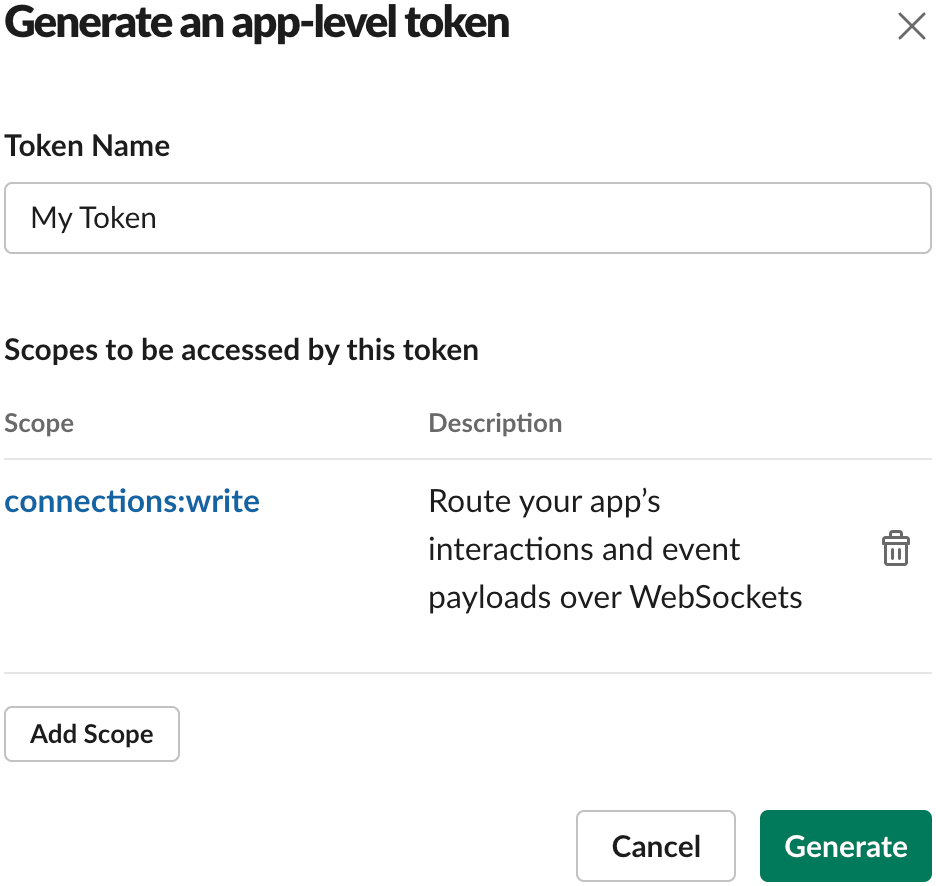
- Type a name for the token
- Click the "Add Scope" button
- Select the connections:write scope
- Click the green "Generate" button
-
Click the "Copy" button to copy the app-level token (
xapp-...) for later, and click the "Done" button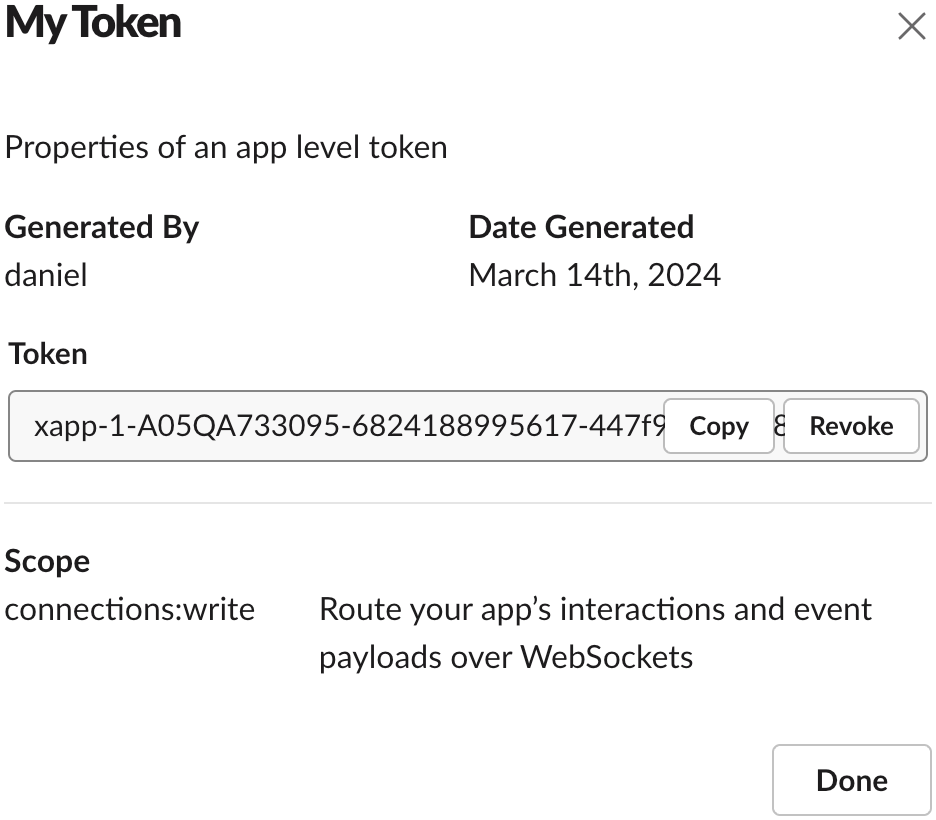
-
Click "Install App" under "Settings" in the left panel, and then click the "Copy" button to copy the bot token (
xoxb-...) for later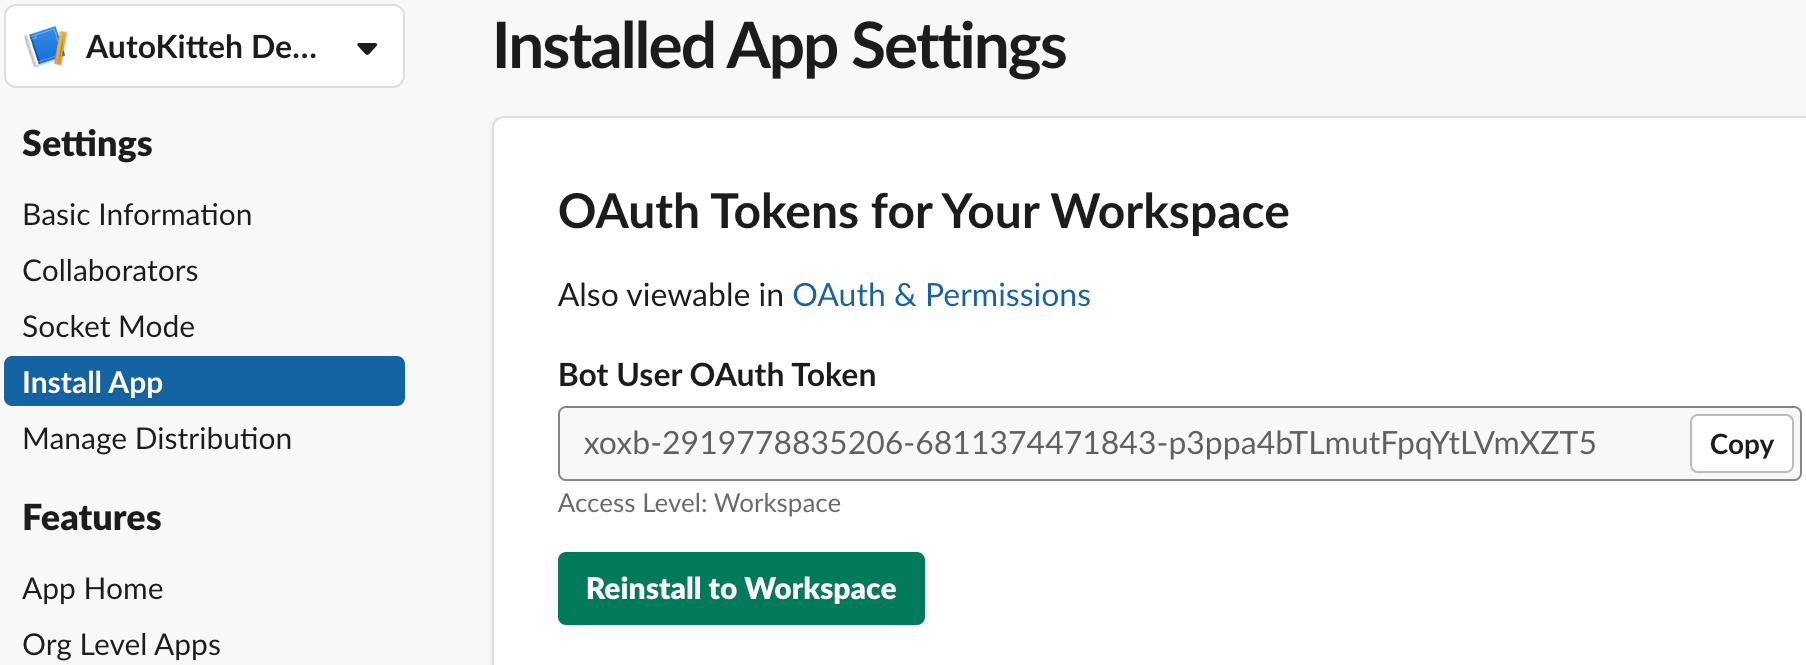
-
Click "App Home" under "Features" in the left panel
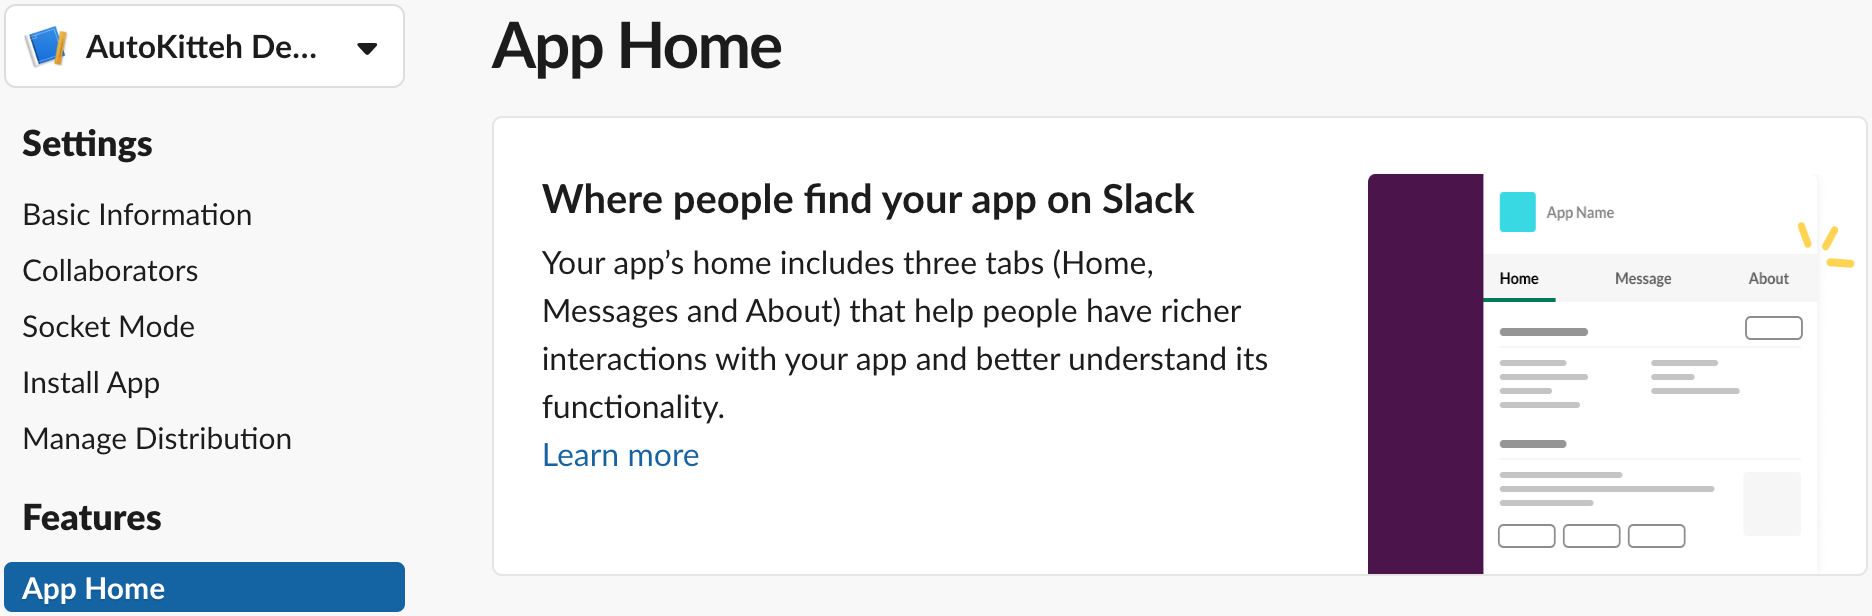
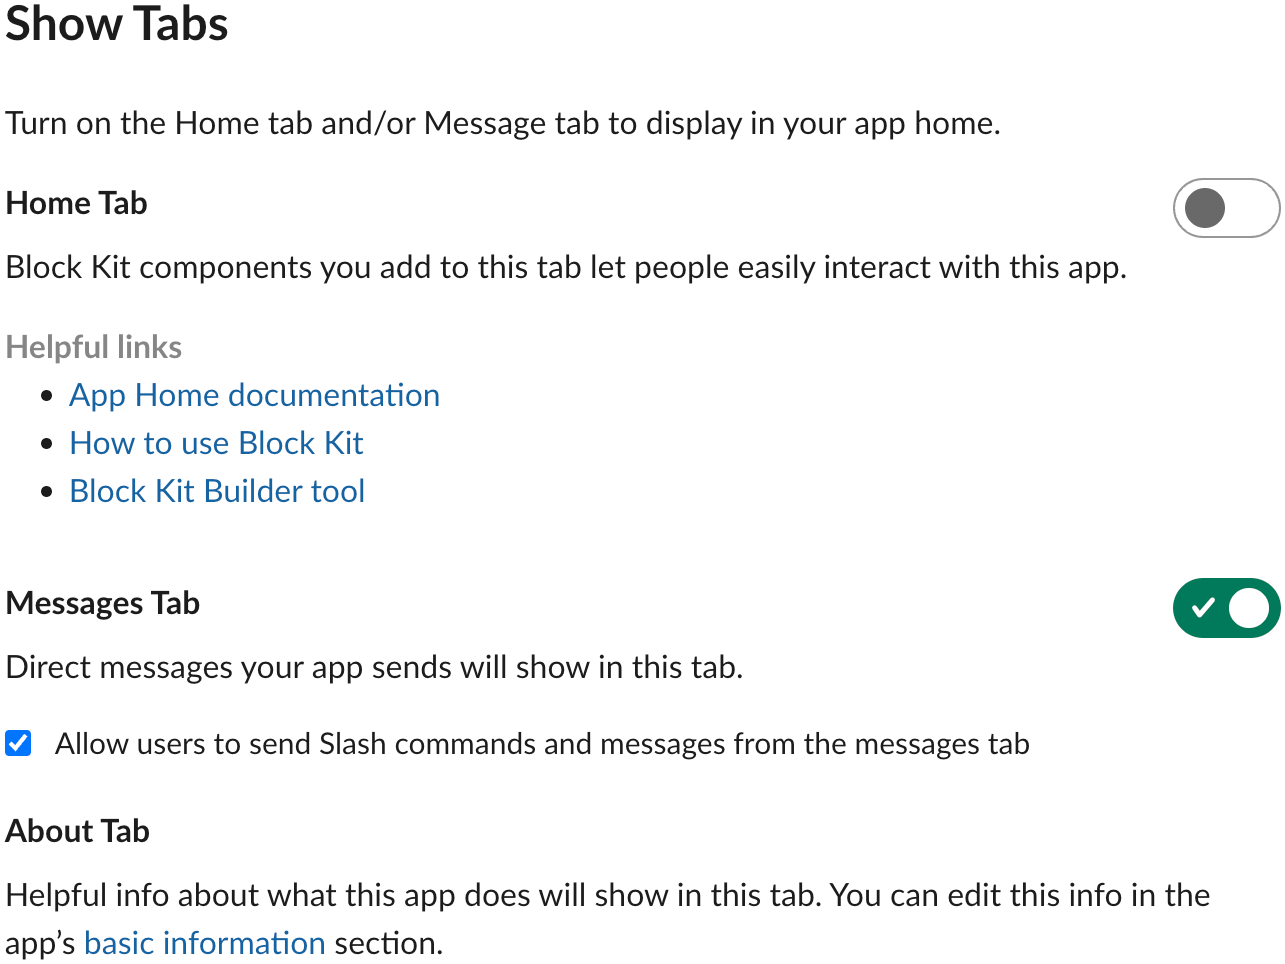
-
Scroll down the page to the "Show Tabs" section, and check the checkbox "Allow users to send Slash commands and messages from the messages tab"
Initialize an AutoKitteh Connection
-
Paste the bot token (
xoxb-...) from step 4 in the Post-Creation Settings section above -
Paste the app-level token (
xapp-...) from step 3 in the Post-Creation Settings section above -
Click the "Save Connection" button