Configuration
Follow this guide in order to:
- Enable AutoKitteh connections to use OAuth 2.0, instead of GCP service account JSON keys
- Enable asynchronous events from Gmail and Google Forms
This guide assumes that the AutoKitteh server is already configured with HTTP tunneling.
Google Cloud Platform (GCP) Project
-
Create a new GCP project
- Follow the instructions at: https://developers.google.com/workspace/guides/create-project
- Quick link: https://console.cloud.google.com/projectcreate
-
Enable Google Workspace APIs in it
- Follow the instructions at: https://developers.google.com/workspace/guides/enable-apis
- Quick links
- Calendar: https://console.cloud.google.com/apis/enableflow?apiid=calendar-json.googleapis.com
- Chat: https://console.cloud.google.com/apis/enableflow?apiid=chat.googleapis.com
- Cloud Pub/Sub: https://console.cloud.google.com/apis/library/pubsub.googleapis.com
- Docs: https://console.cloud.google.com/apis/enableflow?apiid=docs.googleapis.com
- Drive: https://console.cloud.google.com/apis/enableflow?apiid=drive.googleapis.com
- Forms: https://console.cloud.google.com/apis/enableflow?apiid=forms.googleapis.com
- Gmail: https://console.cloud.google.com/apis/enableflow?apiid=gmail.googleapis.com
- Sheets: https://console.cloud.google.com/apis/enableflow?apiid=sheets.googleapis.com
OAuth Consent Screen
-
Create an OAuth consent screen for your GCP project
- Follow the instructions at: https://developers.google.com/workspace/guides/configure-oauth-consent
- Quick link: https://console.cloud.google.com/apis/credentials/consent
-
Specify authorized domains for it
- The AutoKitteh server's public tunnel address
(just the address, no
https://prefix, and no path suffix)
- The AutoKitteh server's public tunnel address
(just the address, no
-
Add these permission scopes to it
- Non-sensitive:
.../auth/userinfo.email.../auth/userinfo.profileopenid
- Sensitive:
.../auth/calendar.../auth/calendar.events.../auth/chat.memberships.../auth/chat.messages.../auth/chat.spaces.../auth/forms.body.../auth/forms.responses.readonly.../auth/spreadsheets
- Restricted:
.../auth/drive.../auth/gmail.modify.../auth/gmail.settings.basic
- Non-sensitive:
Credentials
-
Create an OAuth 2.0 Client ID
- Follow the instructions at: https://developers.google.com/workspace/guides/create-credentials#oauth-client-id
- Quick link: https://console.cloud.google.com/apis/credentials
-
Specific steps and settings
- Click:
+ Create Credentials - Select:
OAuth client ID - Application type:
Web application - Authorized redirect URI:
https://PUBLIC-AK-ADDRESS/oauth/redirect/google- (
PUBLIC-AK-ADDRESSis the AutoKitteh server's public tunnel address)
- Click:
Cloud Pub/Sub
This is required if you wish to receive asynchronous events from Gmail and Google Forms.
-
Go to your GCP project's service accounts page: https://console.cloud.google.com/iam-admin/serviceaccounts
-
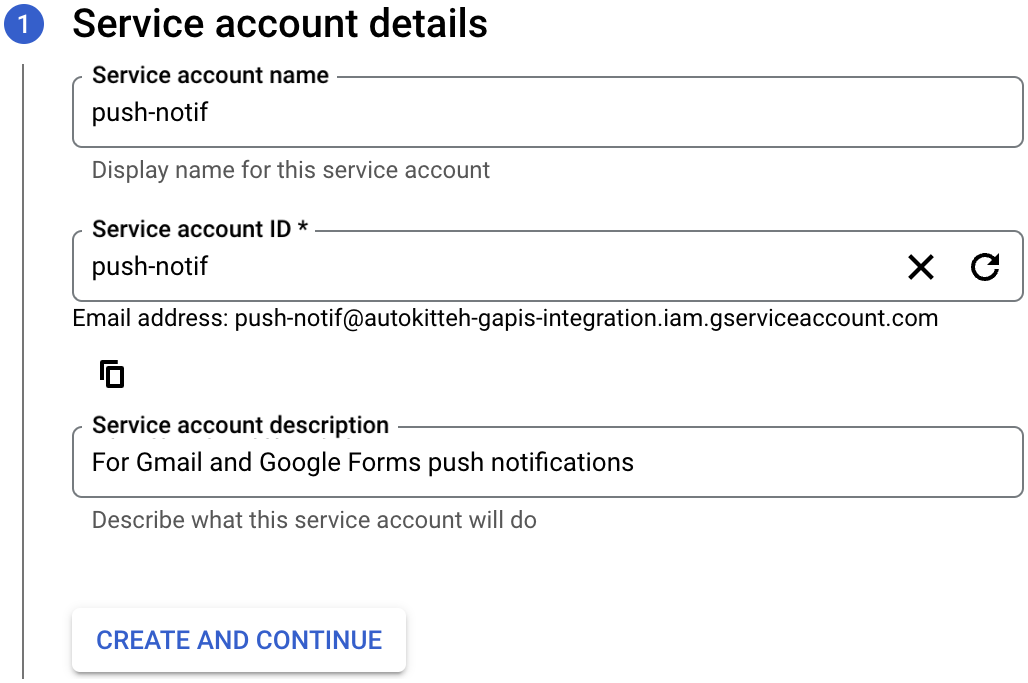
Click the
CREATE SERVICE ACCOUNTbutton at the top of the page
- Required: Service account name
- Optional: Service account ID & description
- Click the
CREATE AND CONTINUEbutton
-
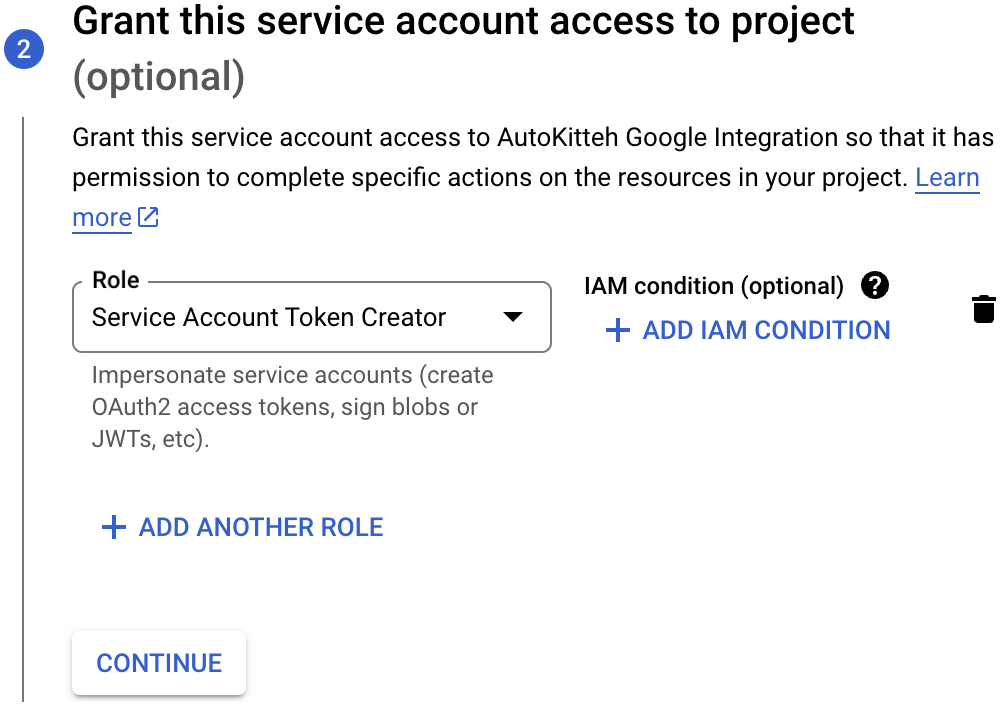
Grant these roles, and click the
CONTINUEbuttonService Account Token Creator
-
Click the
DONEbutton (no need to grant user access)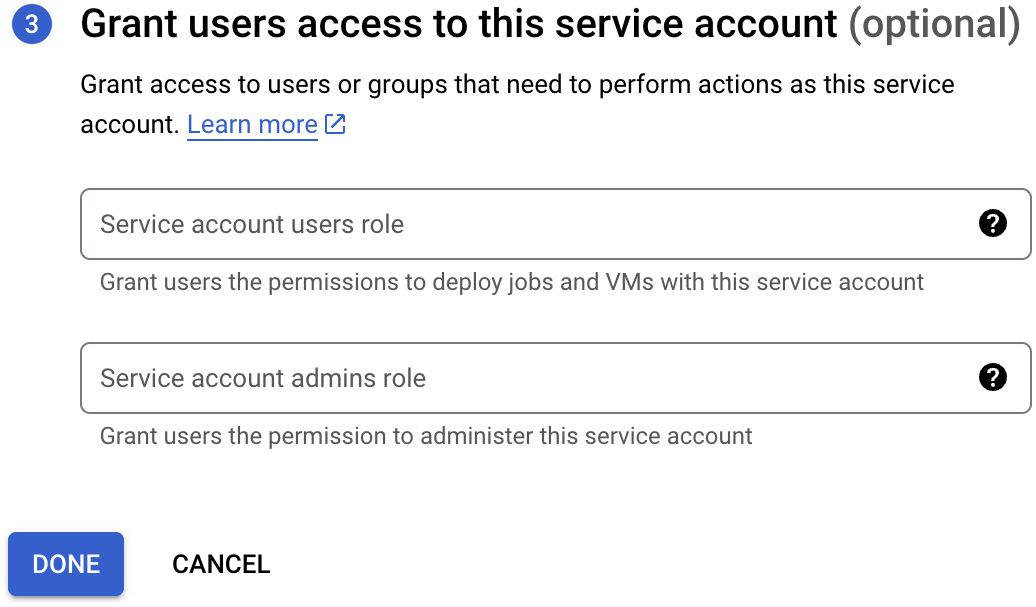
-
Go to your GCP project's Cloud Pub/Sub page: https://console.cloud.google.com/cloudpubsub/topic/list
-
Click the
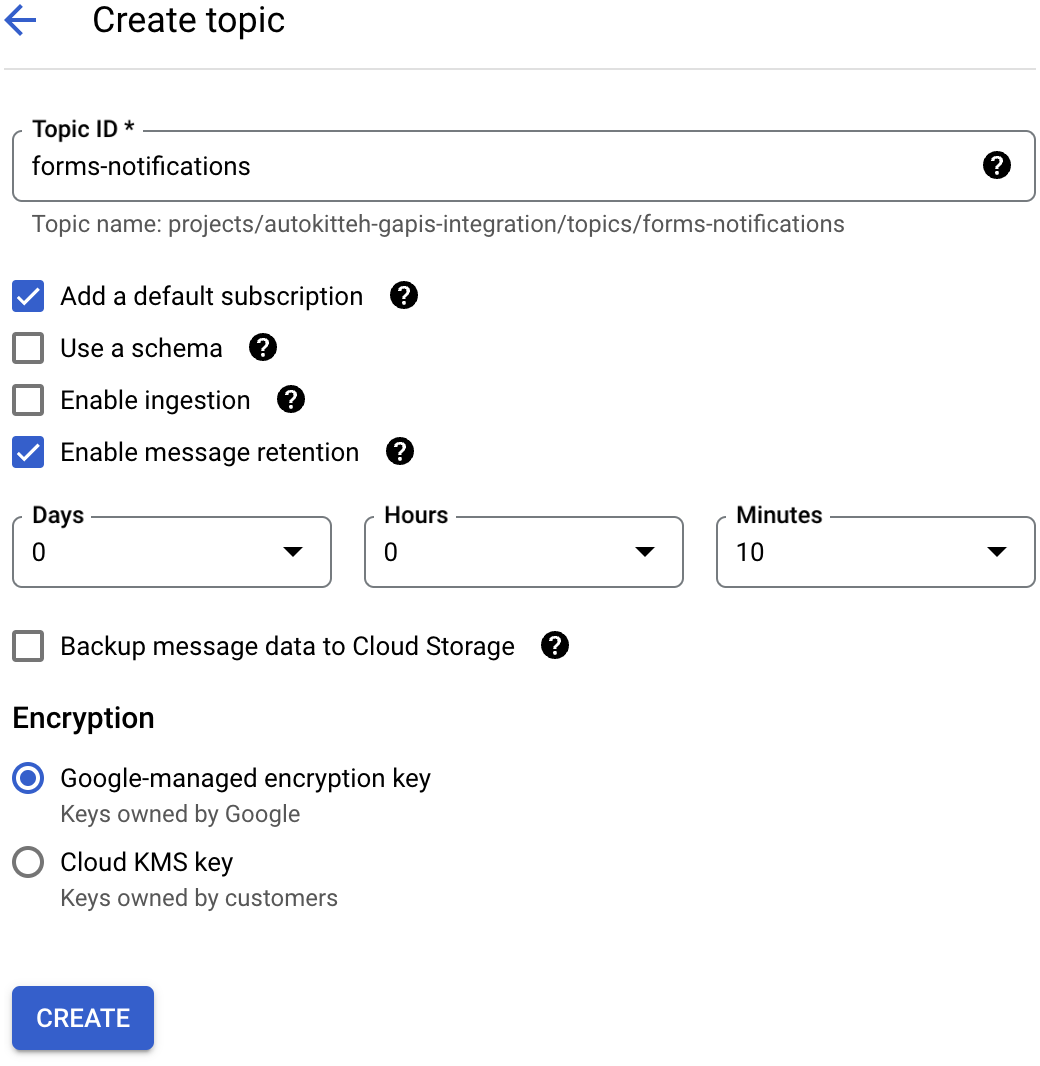
CREATE TOPICbutton at the top of the page
- Topic ID:
forms-notifications - Add a default subscription: Yes (default)
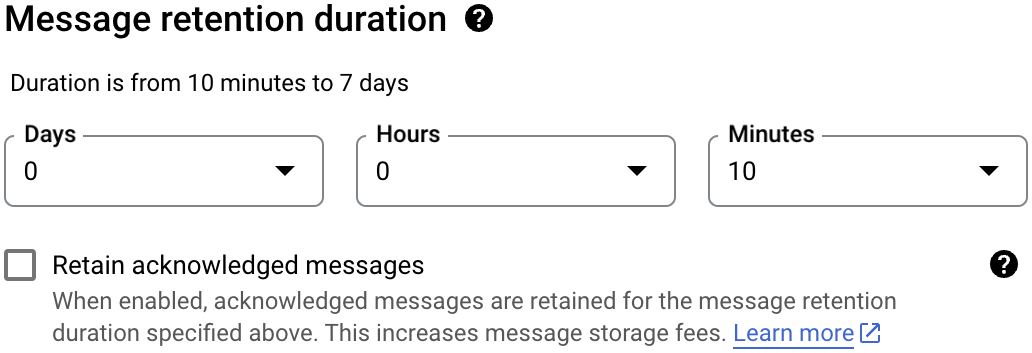
- Enable message retention: 0 Days, 0 Hours, 10 minutes
- Click the
CREATEbutton
- Topic ID:
-
Permissions: click the
ADD PRINCIPALbutton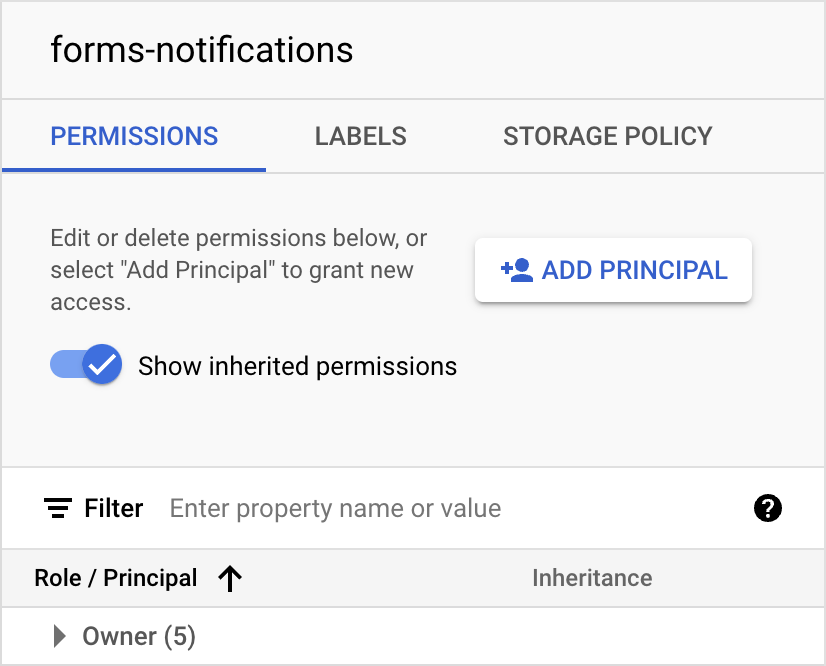
- New principal:
forms-notifications@system.gserviceaccount.com - Role:
Pub/Sub Publisher - Click the
SAVEbutton
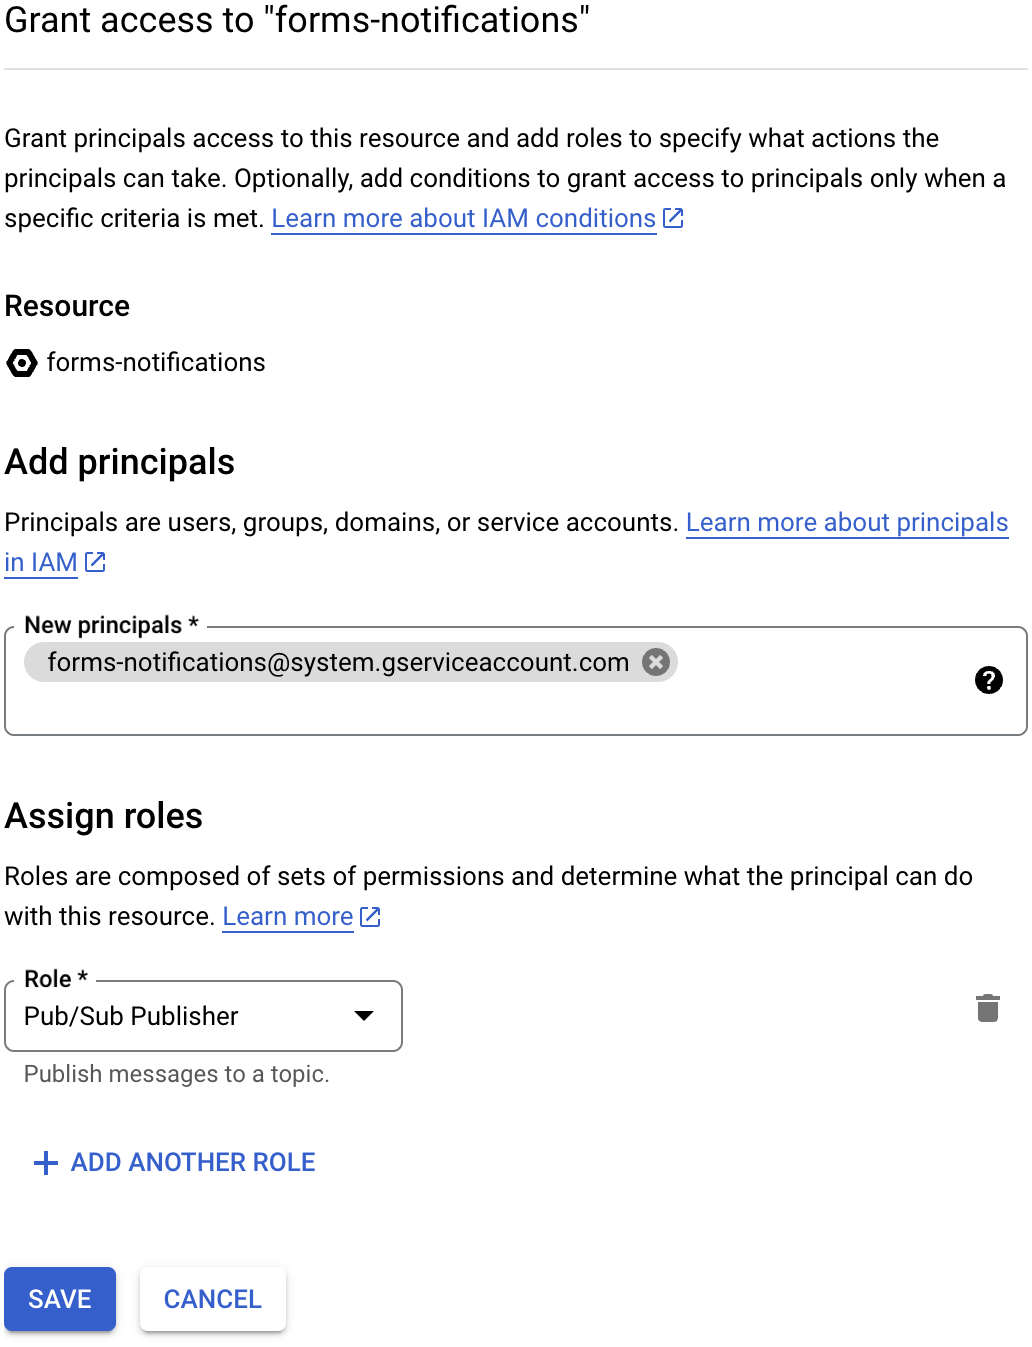
- New principal:
-
Click the auto-created subscription
forms-notifications-sub, and then click itsEDITbutton -
Modify the following details:
-
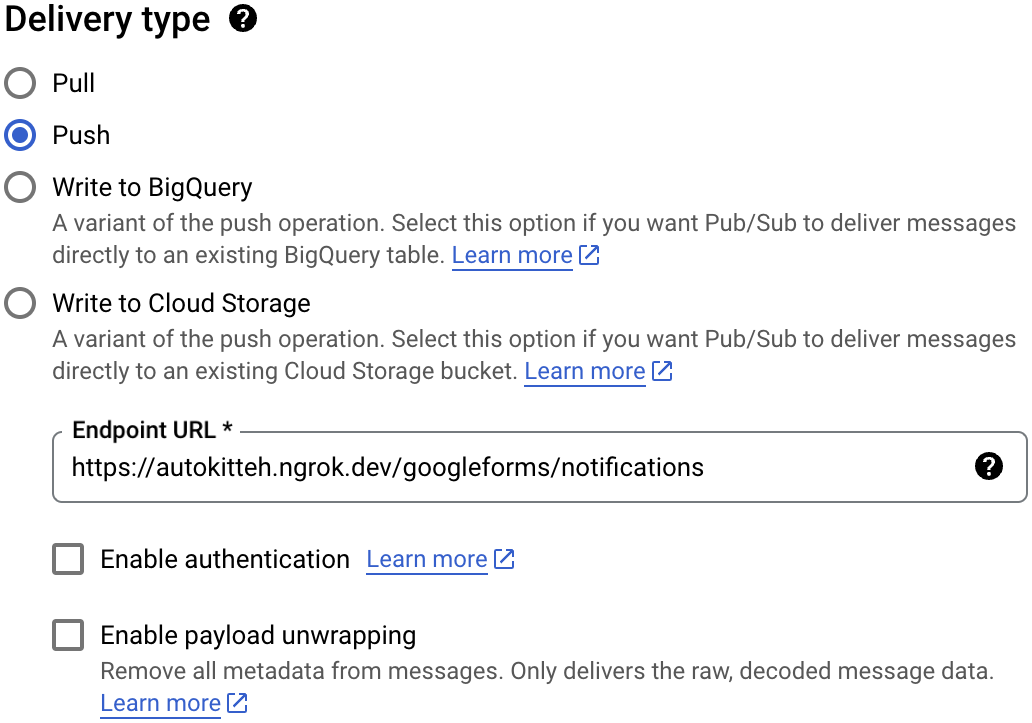
Delivery type: Push
-
Endpoint URL:
https://PUBLIC-AK-ADDRESS/googleforms/notif(PUBLIC-AK-ADDRESSis the AutoKitteh server's public tunnel address) -
Enable authentication: Yes
- Select the service account you created in step 2 above
-
Enable payload unwrapping: Yes
- Write metadata: Yes
-
Message retention duration: 0 Days, 0 Hours, 10 minutes
-
Expiration period: Never expire
-
Acknowledgement deadline: 10 seconds (default)
-
Message ordering: No (default)
-
Dead lettering: No (default)
-
Retry policy: Retry immediately (default)
-
Click the
UPDATEbutton
-
-
Repeat steps 5-9 with these changes:
- Topic ID:
gmail-api-push- Enable message retention: 10 minutes
- New principal with the
Pub/Sub Publisherrole:gmail-api-push@system.gserviceaccount.com - Subscription:
- Endpoint URL:
https://PUBLIC-AK-ADDRESS/gmail/notif(PUBLIC-AK-ADDRESSis the AutoKitteh server's public tunnel address)
- Endpoint URL:
- Everything else should be the same
- Topic ID:
Configure AutoKitteh
There are two equivalent options to configure the AutoKitteh server to interact with your GCP OAuth consent screen - choose the one most suited for your needs and constraints.
For more details, see the Configuration Methods page.
config.yaml File
Stay tuned!
Environment Variables
Set this environment variable, based on the AutoKitteh server's public tunnel address:
WEBHOOK_ADDRESS- Just the address, without the
https://prefix, and without a path suffix
- Just the address, without the
Also set these environment variables, based on the generated details in the credentials you created above:
GOOGLE_CLIENT_IDGOOGLE_CLIENT_SECRET
Also set these optional environment variables, based on the topic(s) you configured in the Cloud Pub/Sub section, if you did so:
GMAIL_PUBSUB_TOPICGOOGLE_FORMS_PUBSUB_TOPIC
Lastly, restart the AutoKitteh server for these settings to take effect.