Default GitHub (OAuth 2.0) App
Overview
GitHub Apps are tools that extend GitHub's functionality. GitHub Apps can do things on GitHub like open issues, comment on pull requests, and manage projects. They can also do things outside of GitHub based on events that happen on GitHub. For example, a GitHub App can post on Slack when an issue is opened on GitHub.
This connection mode does not require any preparation by project owners, but it depends on a preexisting AutoKitteh server-wide configuration.
If you want to use your own GitHub app, see the Private App guide.
If you want to use a Personal Access Token (PAT) and/or a personal webhook, see the PAT + Webhook guide.
Only organization and repository owners can install GitHub apps.
This guide assumes that the AutoKitteh server is already configured with HTTP tunneling.
GitHub Documentation
Background information: about using GitHub apps.
Create a GitHub App
Depending on your preference, use one of these options:
-
The app will be owned by you, i.e. a GitHub user:
https://github.com/settings/apps/new -
The app will be owned by a GitHub organization:
https://github.com/organizations/ORG-NAME/settings/apps/new
(This requires GitHub organization owner privileges)
If you want the GitHub app to be private, create it in the same GitHub user/organization scope where you intend to install it. If you want multiple GitHub users and organization to install it, create a public GitHub app.
You will make this choice in step 7 below.
-
Required details:
- GitHub App name
- Homepage URL
-
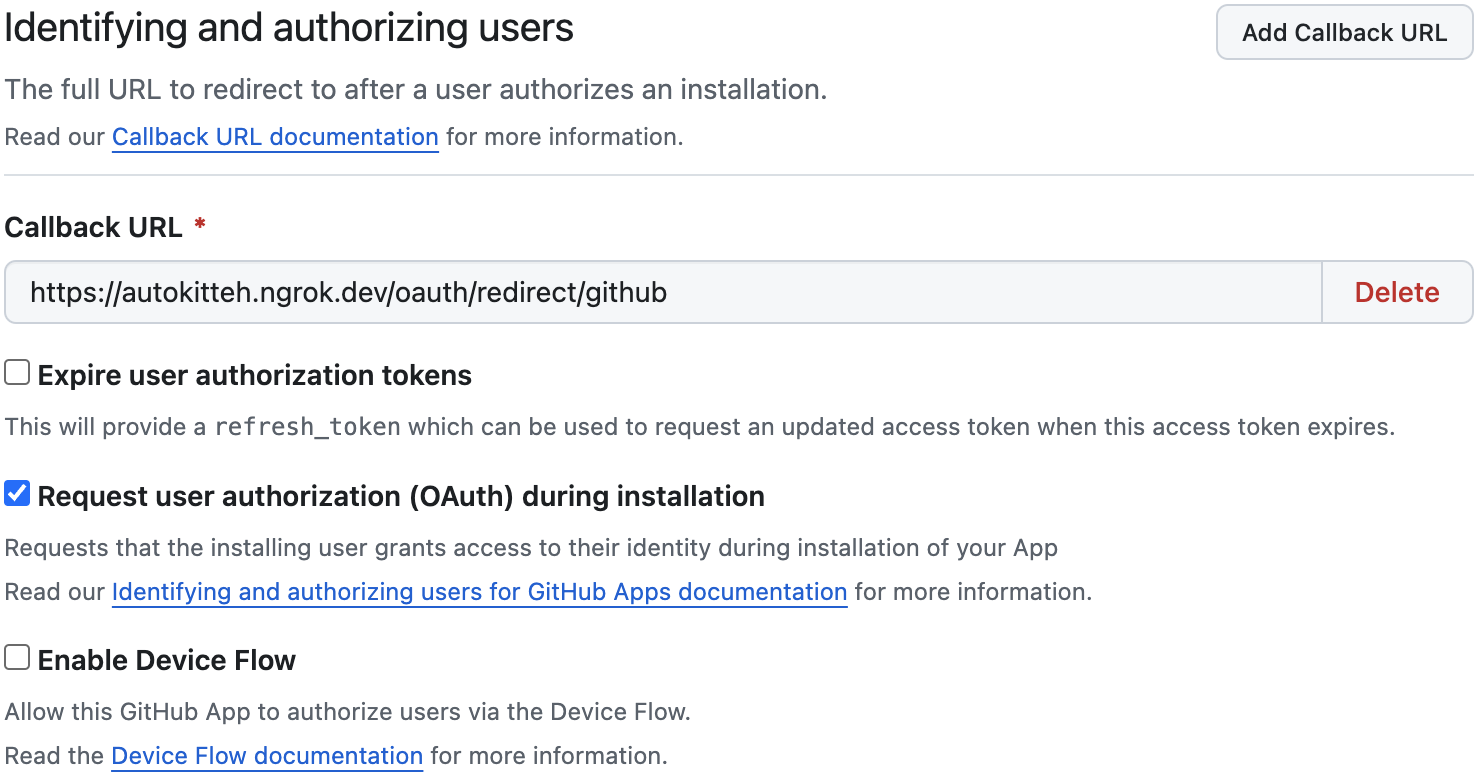
Identifying and authorizing users:
-
Callback URL:
- AutoKitteh public cloud:
https://api.autokitteh.cloud/oauth/redirect/github - Dedicated environments:
https://NAME-api.autokitteh.cloud/oauth/redirect/github
(whereNAMEis the AutoKitteh server's name) - Self-hosted servers:
https://PUBLIC-ADDRESS/oauth/redirect/github
(wherePUBLIC-ADDRESSis the public tunnel address)
- AutoKitteh public cloud:
-
Expire user authorization tokens: No
-
Request user authorization (OAuth) during installation: Yes
-
-
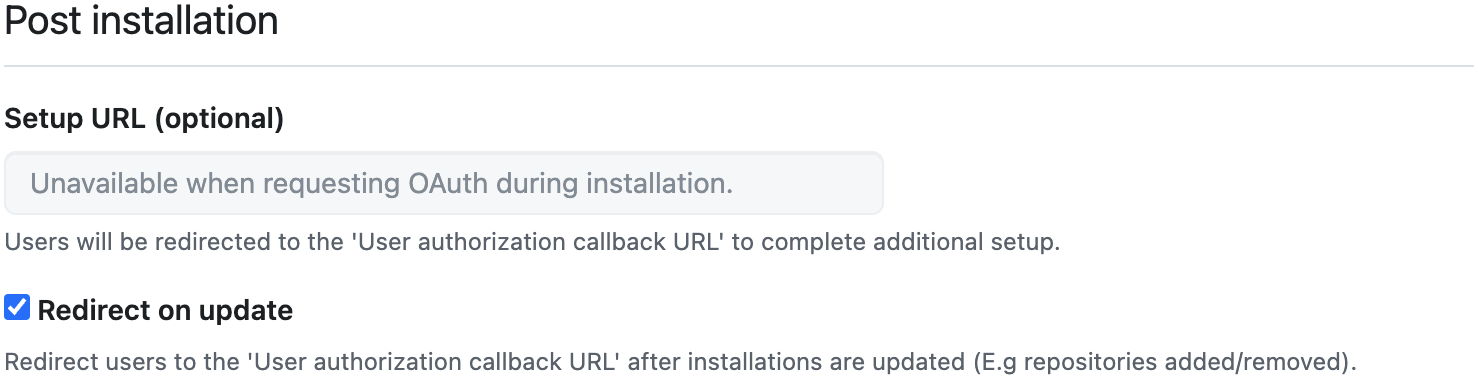
Post installation:
-
Redirect on update: Yes
-
-
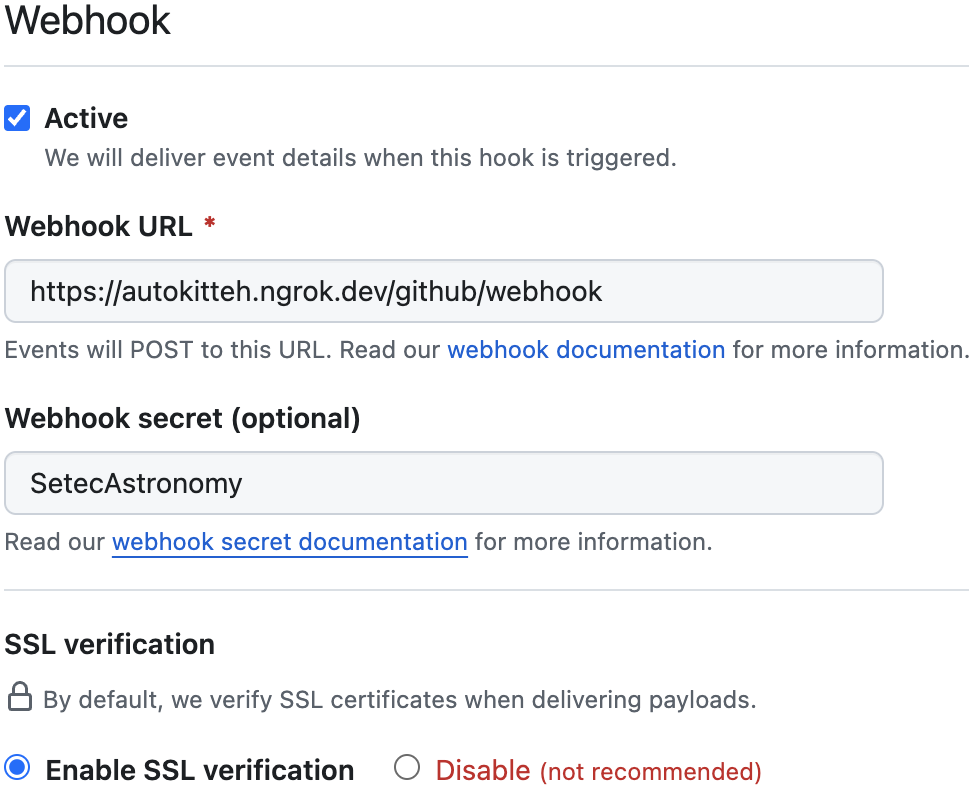
Webhook:
-
Active: Yes (default)
-
Webhook URL:
- AutoKitteh public cloud:
https://api.autokitteh.cloud/github/webhook - Dedicated environments:
https://NAME-api.autokitteh.cloud/github/webhook
(whereNAMEis the AutoKitteh server's name) - Self-hosted servers:
https://PUBLIC-ADDRESS/github/webhook
(wherePUBLIC-ADDRESSis the public tunnel address)
- AutoKitteh public cloud:
-
Webhook Secret: random and secret string of your choice
-
-
Permissions:
Your choices in this section depend on a balance between functional and security needs, which GitHub API calls you expect AutoKitteh scripts to make, and which GitHub API events you expect AutoKitteh scripts to respond to.
ATTENTIONPermission changes have to be accepted by owners of existing installations before they become effective.
Some common repository permission examples:
- Actions
- Administration
- Commit statuses
- Contents
- Issues
- Metadata (mandatory)
- Pull requests
Some common organization permission examples:
See also this comprehensive guide: permissions for GitHub apps.
-
Subscribe to events:
Your choices in this section depend on the chosen permissions above, and which GitHub API events you expect AutoKitteh scripts to respond to.
Some common examples:
-
Where can this GitHub App be installed?
Choose one of these options:
Only on this account(only the GitHub user/org that created this GitHub app)Any account(any GitHub user or organization)
-
Click the green button "Create GitHub App"
App Details
-
Copy the
App IDandClient IDstrings at the top of the app settings page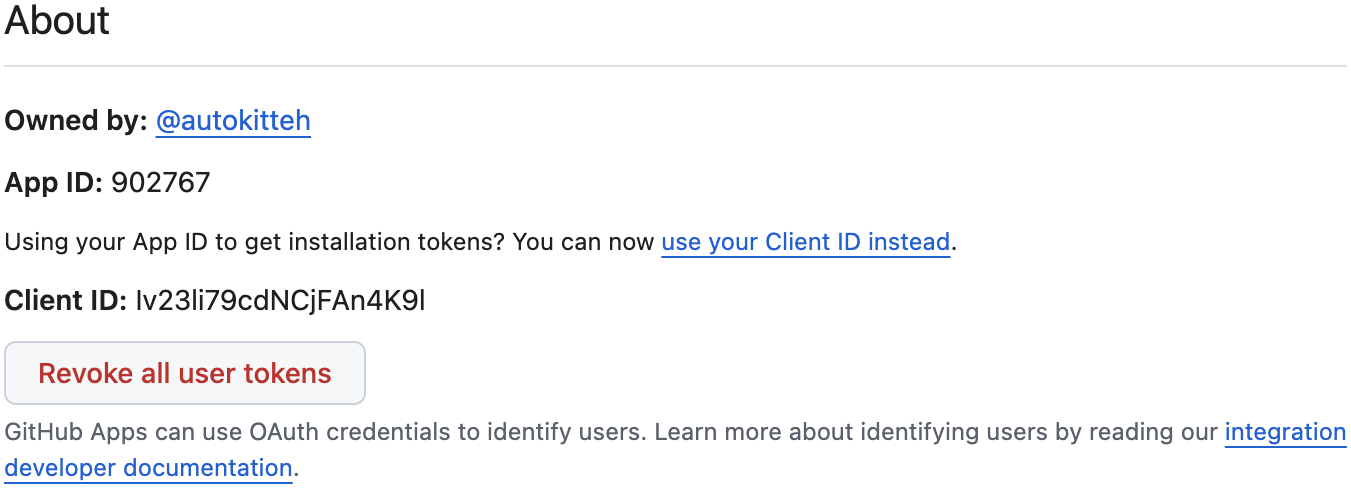
-
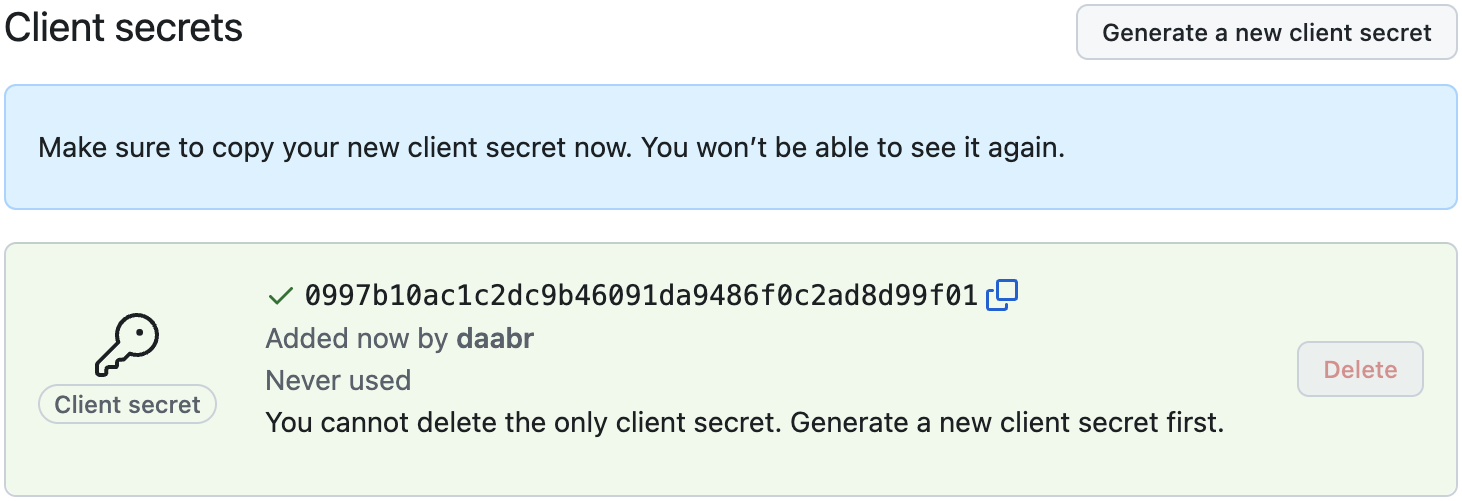
Click the button "Generate a new client secret", and copy the new string; you will not be able to see it again once you leave this page
-
Double-check that the webhook secret was indeed set when you created the app; if it's not, set it again, and click the green "Save changes" button

-
Click the "Generate a private key" button at the bottom of the app settings page
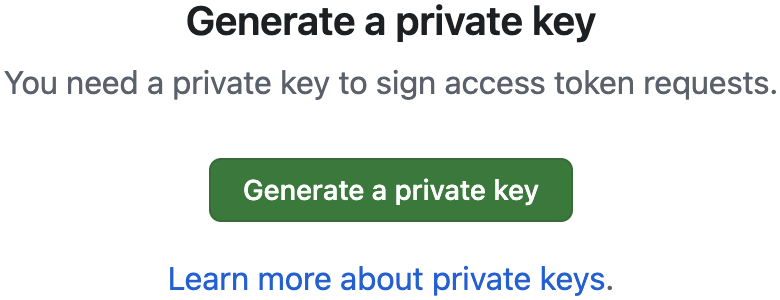
- This will auto-download a file named
APP-NAME.DATE.private-key.pem - Convert this file into a single-line string with this command-line:
cat NAME.YY-MM-DD.private-key.pem | awk 'NF {sub(/\r/, ""); printf "%s\\n",$0;}' - Delete this file
- This will auto-download a file named
AutoKitteh Server
You can configure the AutoKitteh server to interact with a GitHub app using either of two equivalent methods. Choose the one that best fits your needs and constraints.
For more details, see the Configuration Methods page.
Lastly, restart the AutoKitteh server for these settings to take effect.
Environment Variables
Set this environment variable, based on the AutoKitteh server's public tunnel address:
WEBHOOK_ADDRESS- Just the address, without the
https://prefix, and without a path suffix
- Just the address, without the
Also set this environment variable:
GITHUB_APP_NAME- Based on the suffix of the app settings URL:
https://github.com/.../settings/apps/APP-NAME
- Based on the suffix of the app settings URL:
Also set these environment variables, based on the values you were instructed to copy in the App Details section above:
GITHUB_APP_IDGITHUB_CLIENT_IDGITHUB_CLIENT_SECRET- Readbale only when re/generated
GITHUB_WEBHOOK_SECRET- Readable only when re/set
GITHUB_PRIVATE_KEY- Downloadable only when re/generated
- When setting the environment variable, the value has to be enclosed in
quotes (e.g.
GITHUB_PRIVATE_KEY="...value...") because it contains special characters
If your organization uses a private
GitHub Enterprise Server
(GHES) instead of https://github.com
https://github.comSet the environment variable GITHUB_ENTERPRISE_URL to the GHES URL inside your organization's VPC without a path, i.e. a string that looks like this: http[s]://host[:port].
config.yaml File
Will be implemented soon. Stay tuned!
AutoKitteh Connections
When you create, initialize, or edit the connection in an AutoKitteh project:
-
Select the "GitHub" connection type, if not selected yet
-
Select the "Default GitHub app" authentication type, if not selected yet
-
Click the "Start OAuth Flow" button